This article is best viewed on laptop or desktop devices.
This guide will help you install and activate Windows 10. Please make sure that your computer meets the Windows 10 hardware requirements:
- Graphics: DirectX 9 graphics processor with WDDM 1.0 driver
- Hard disk space: 16 GB for 32-bit; 32 GB for 64-bit
- Memory: 1 GB RAM for 32-bit, 2 GB RAM for 64-bit
- Processor: 1 GHz
Do you want to upgrade Windows 10 Home to Windows 10 Pro?
If you have a laptop or a PC which already runs Windows 7, 8 or 8.1, or you want to reinstall your Windows 10, the process is simple – all you need is internet connection.
Creating an installation ISO file for Windows 10
1. Download Media Creation Tool (MCT):
Download Media Creation Tool (MCT) for Windows 10
IMPORTANT: Media Creation Tool can only be used on Windows 7, Windows 8, Windows 8.1, and Windows 10.
2. Open the MediaCreationTool.exe file and follow the instructions in the slideshow below:

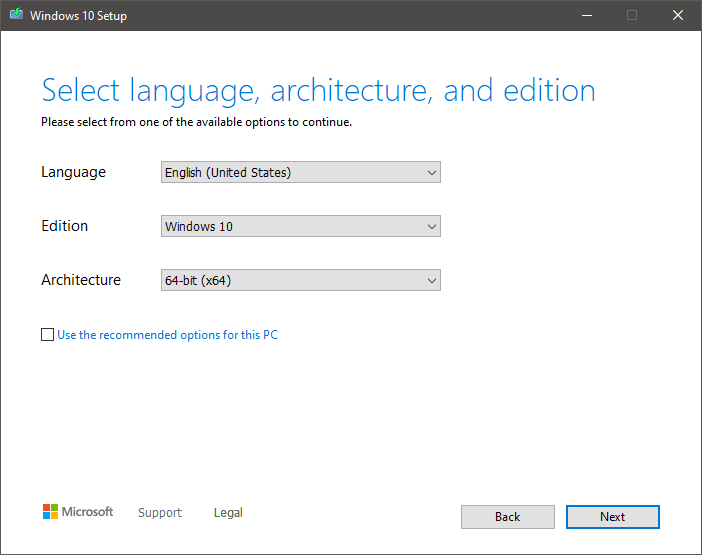
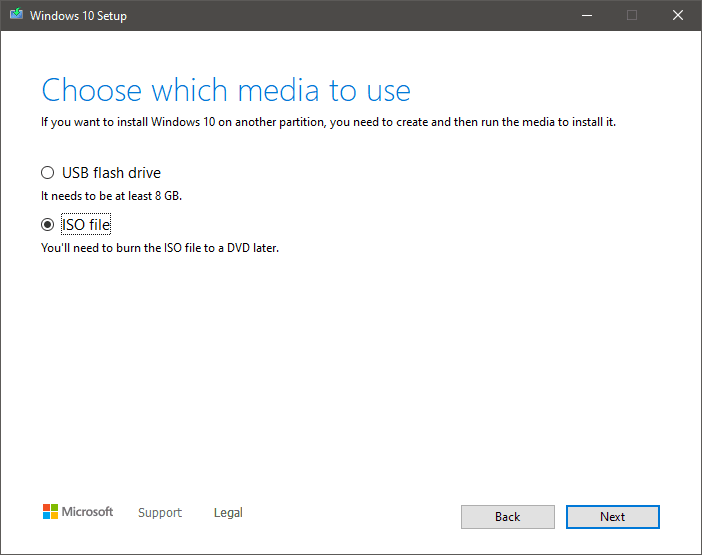
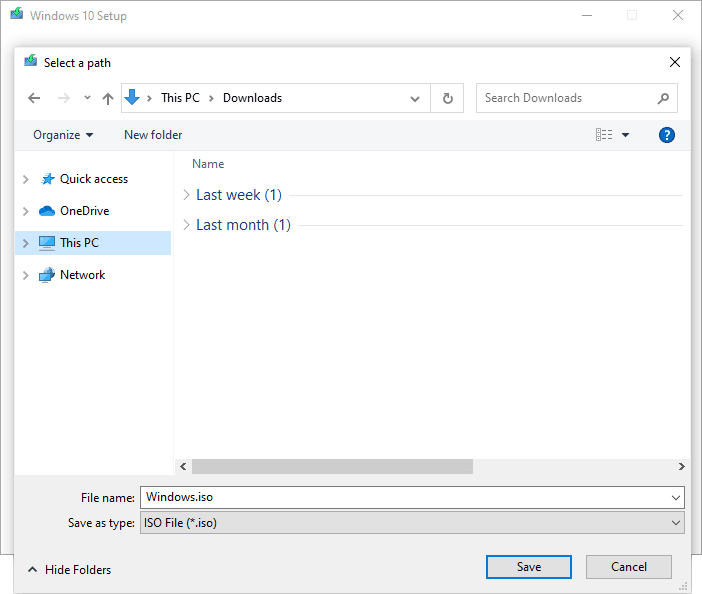

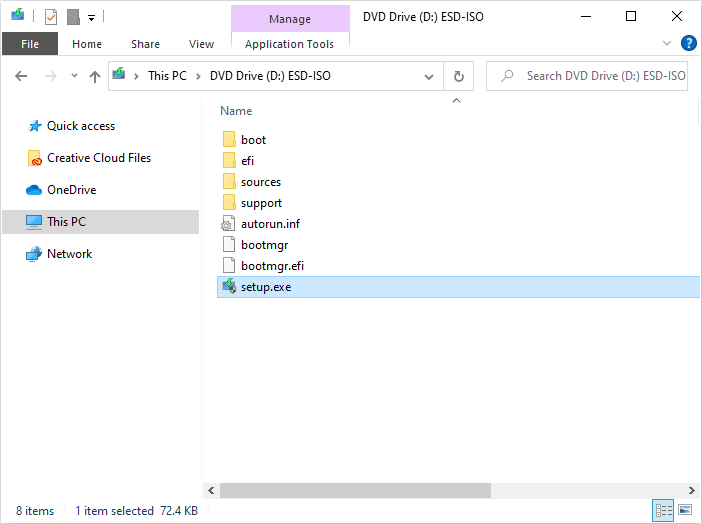
Note: On Windows 7, you might need to open the ISO file through a virtual DVD software, e.g Virtual CloneDrive or Daemon Tools.
3. After executing the steps in the slideshow above, the Windows 10 Setup will open – go to tab Setup for detailed instructions.
If you have a laptop or a PC that doesn’t have an operating system, or you want to perform a clean installation, you will need to create an installation USB. For that purpose you will need:
- an empty USB drive of minimum 8 GB;
- another computer with an internet connection and Windows 7 or newer.
Once you have everything ready, you can start with the installation.
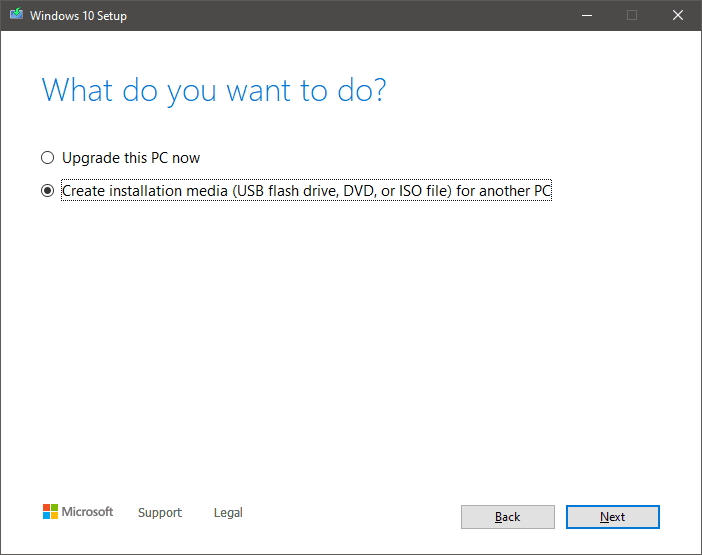
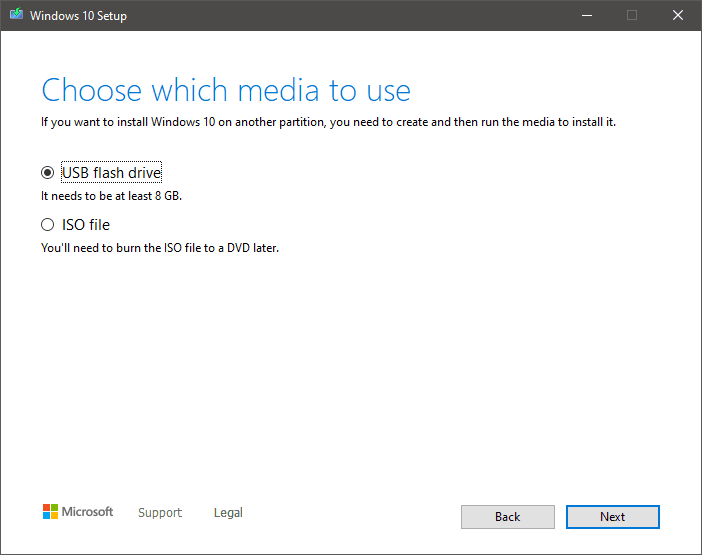
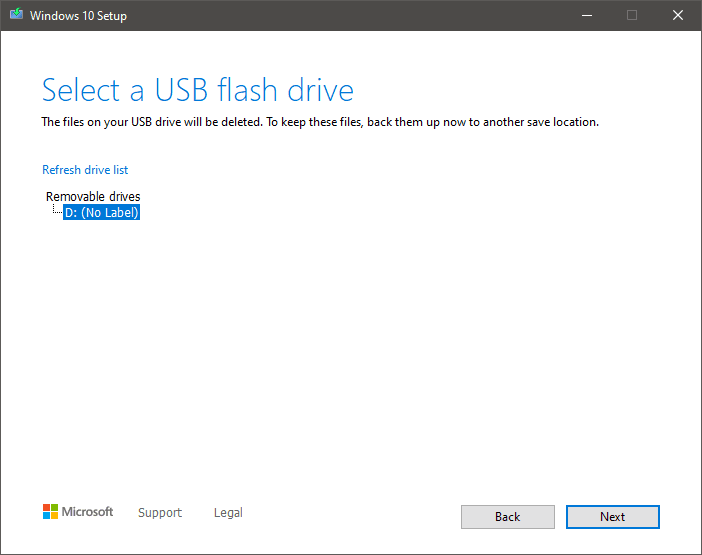
Creating a bootable USB flash drive for Windows 10
1. Insert the USB drive that you want to use as your installation media into your PC/laptop. Make sure you know which drive letter it’s been assigned (D, E, F, etc.).
2. Download Media Creation Tool (MCT):
Download Media Creation Tool (MCT) for Windows 10
IMPORTANT: Media Creation Tool can only be used on Windows 7, Windows 8, Windows 8.1, and Windows 10.
3. Open the MediaCreationTool.exe file and follow the instructions below:

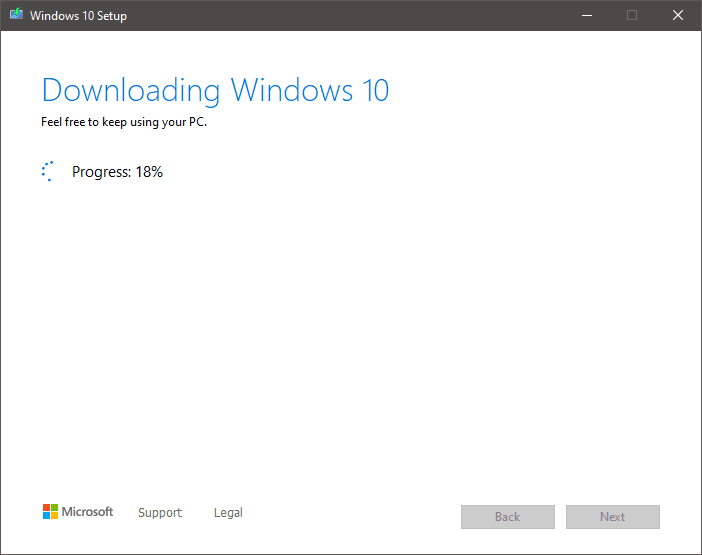
4. After the Media Creation Tool finishes converting your USB to a bootable drive, close it and unplug the USB.
5. Plug the USB in the device on which you want to install Windows 10 and turn the computer on.
6. Continue with the actual Windows 10 installation.
Installation not starting? Set up booting priority in BIOS
Most modern PCs and laptops will recognize the installation media immediately and will start installing Windows 10. In case the installation doesn’t start, you may have to set up device boot priority in BIOS.
Restart the computer and while it’s still loading, press ESC / F1 / F2 / F8 / F10 / F12 (the correct keyboard button is different for different devices) during the initial startup screen. A BIOS menu will appear.
Example of a BIOS menu – the BIOS Features section contains the Boot Option Priorities.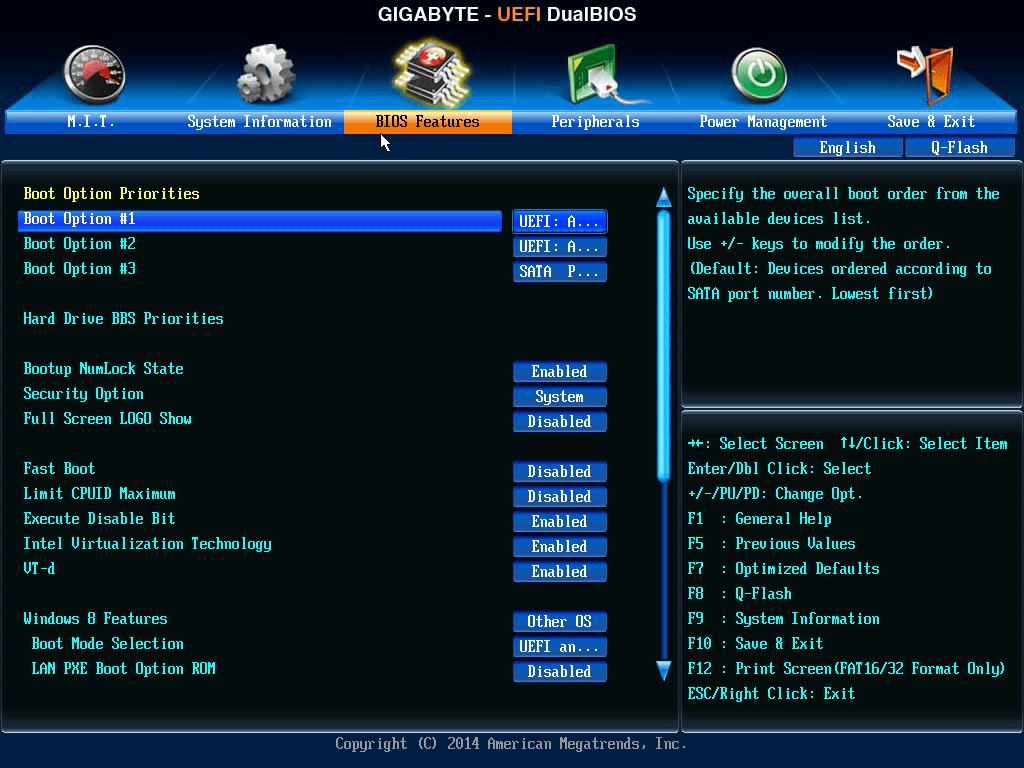
- Select the option to enter BIOS setup. The BIOS setup utility page will appear.
- Use the arrow keys on your keyboard to select the BOOT tab or section. System devices appear in order of priority.
- To give your USB device a boot sequence priority over the main hard drive, do the following:
- Move the hard drive device to the top of the boot sequence list.
- Expand the hard drive device to display all hard drives.
- Move the USB device to the top of the list of hard drives.
- Now choose Save and exit the BIOS setup utility.
- The computer will restart with the changed settings and the Windows 10 Setup will automatically start – go to tab Setup for detailed instructions.
After creating either an installation ISO or a bootable USB, you can start with the actual Windows 10 installation and configuration.
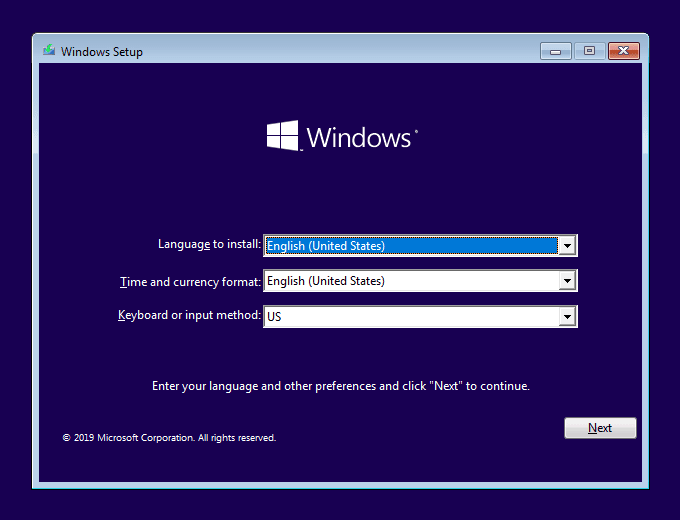
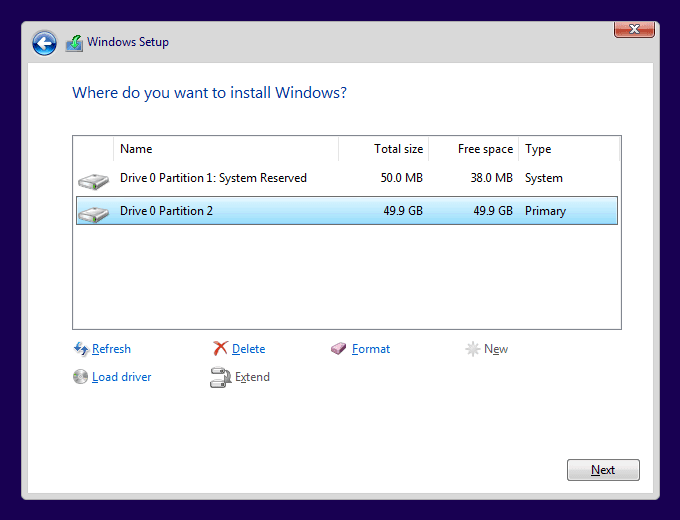
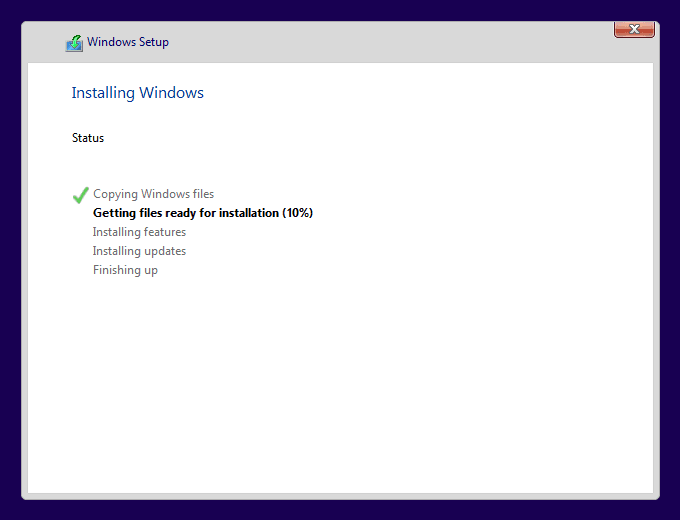
Installing Windows 10
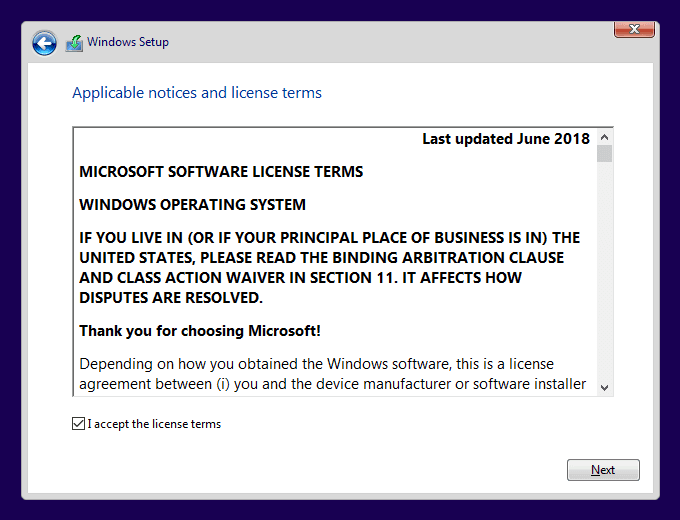
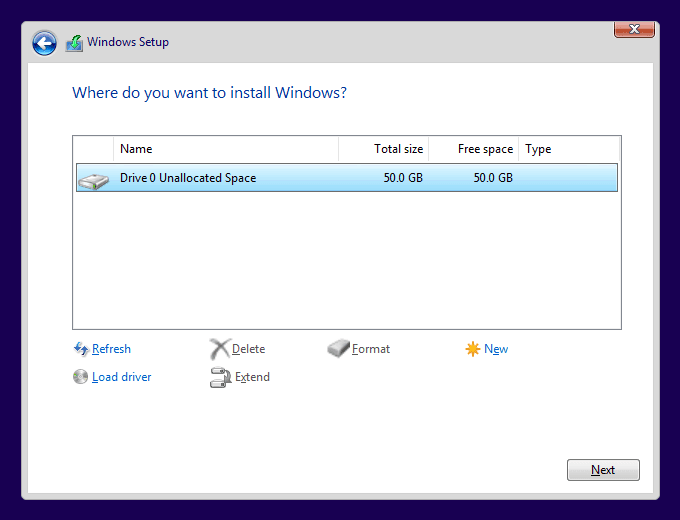
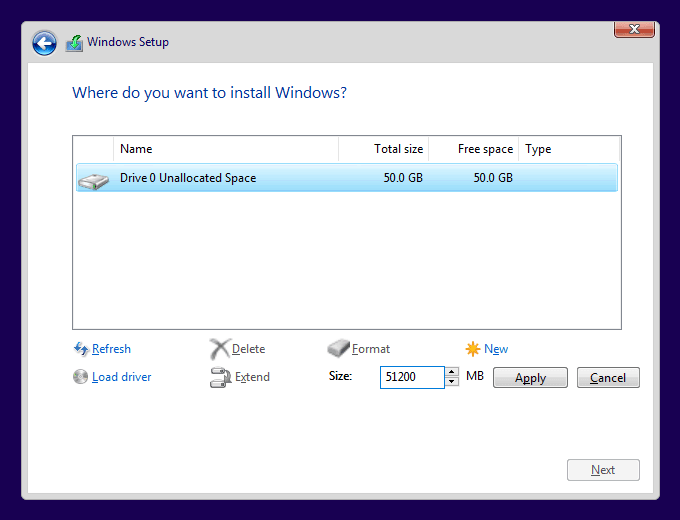
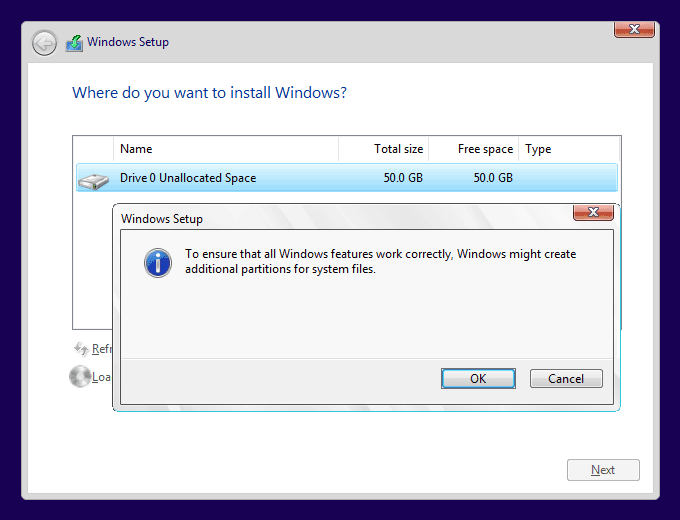
Follow the instructions in the slideshow below to install Windows 10:

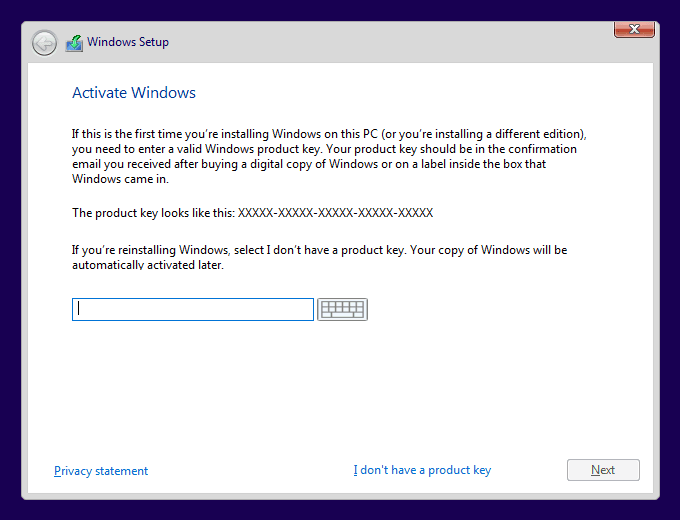
- enter the product key – the setup wizard will automatically select your Windows edition and activate it;
- skip this step – you can click “I don’t have a product key” and activate your Windows after installation.
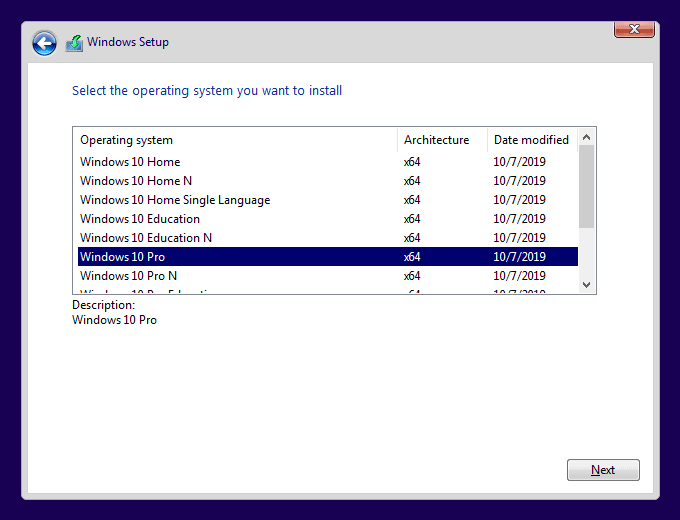
IMPORTANT: select the exact name of the edition for which you have a product key, otherwise you won’t be able to activate it later.
Example:
Windows 10 Pro key + Windows 10 Pro system = successful activation
Windows 10 Pro key + Windows 10 Pro N system = failed activation

- Upgrade – keeps files, apps and settings; useful when installing Windows 10 to replace another Windows version.
- Custom – performs a clean installation.
This guide uses the Custom option.

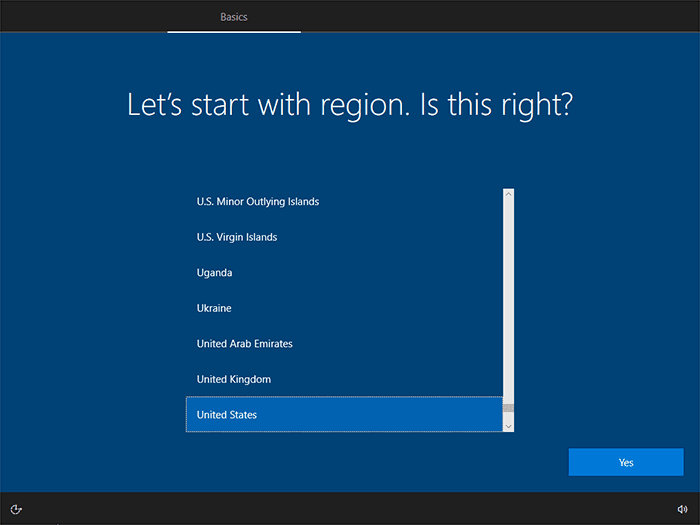
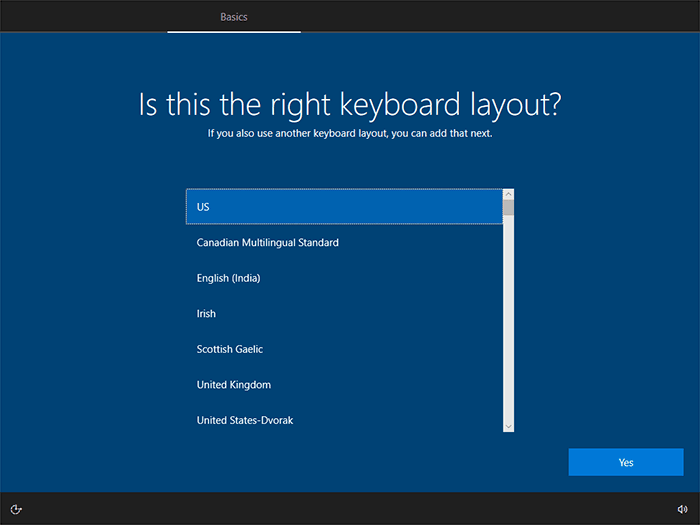
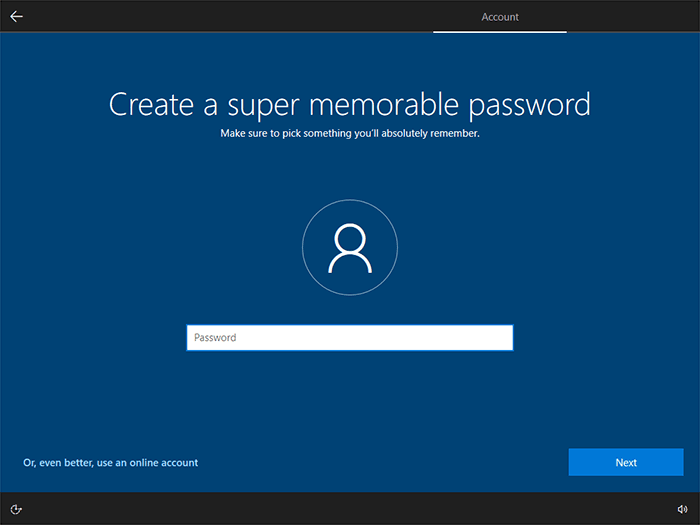
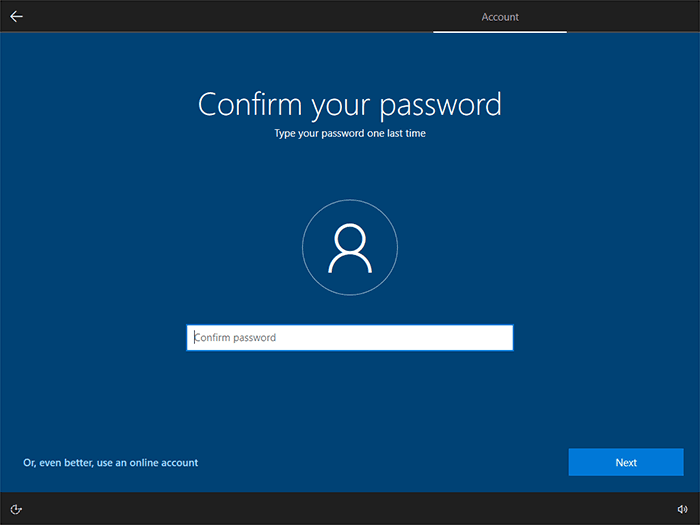
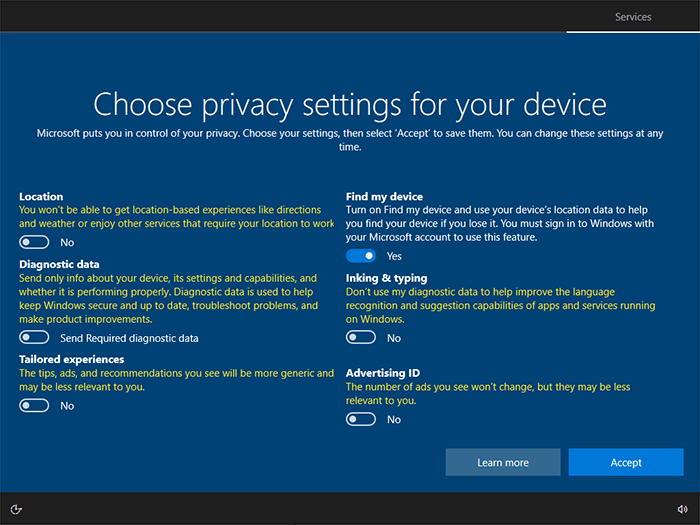
Configuring Windows 10
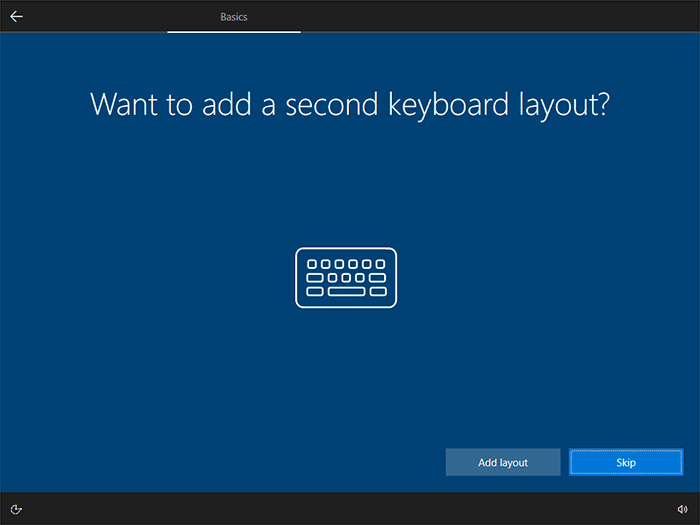
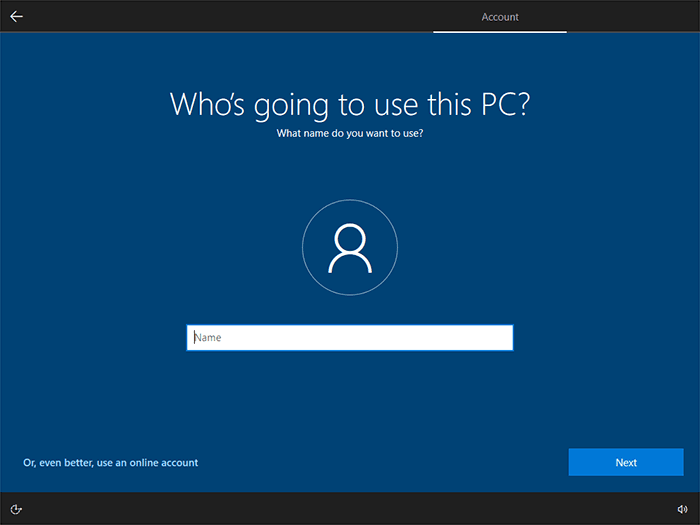
When the Windows 10 installation finishes, before being able to do anything else, you will be asked to configure your Windows account and a couple of other settings. Follow the instructions in the slideshow below to configure Windows 10 quickly and without unnecessary clutter:
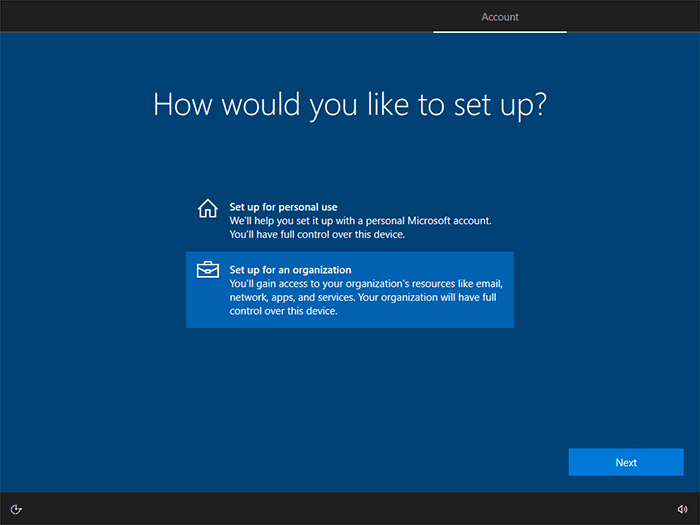
This guide uses the business option.

This guide uses the Domain join option which creates an offline account (lower left corner).
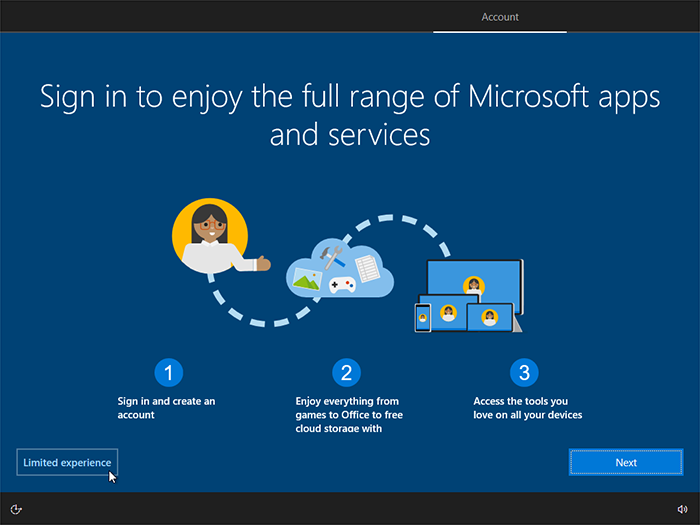
The experience is not really limited, it is just not as tied to Microsoft’s online services as when users sign in with a Microsoft account. You can change to an online account any time after installation from the Start menu by going to Settings → Accounts.

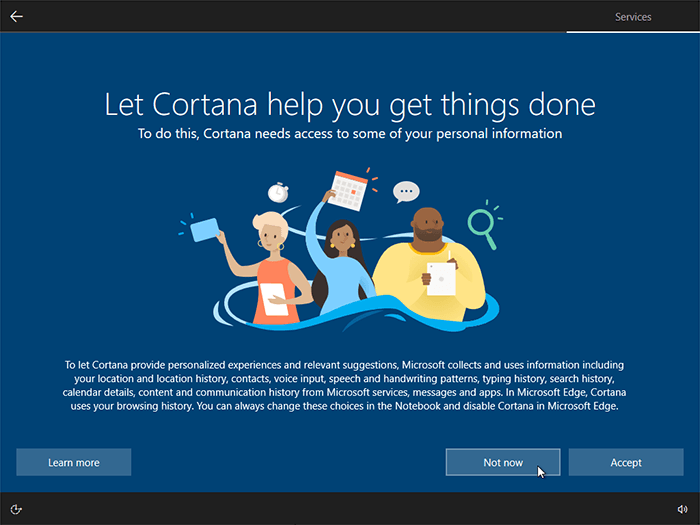
You can skip this step by clicking Not now.
Note: You can change most of the configurations any time – click the Settings icon ( ![]() ) in the Start menu to access them.
) in the Start menu to access them.
IMPORTANT: After installing and configuring Windows 10, don’t forget to activate it – go to tab Activation for detailed instructions.
After the installation is finished, Windows 10 must be activated within 30 days after the first login into the system. If it’s not activated, it is considered illegal and you’re putting all of your data at risk, because they’re not being protected.
Windows 10 activation is quick and easy:
- Click the Start menu on your desktop and choose the Settings icon:

- Click Update & Security and go to Activation.
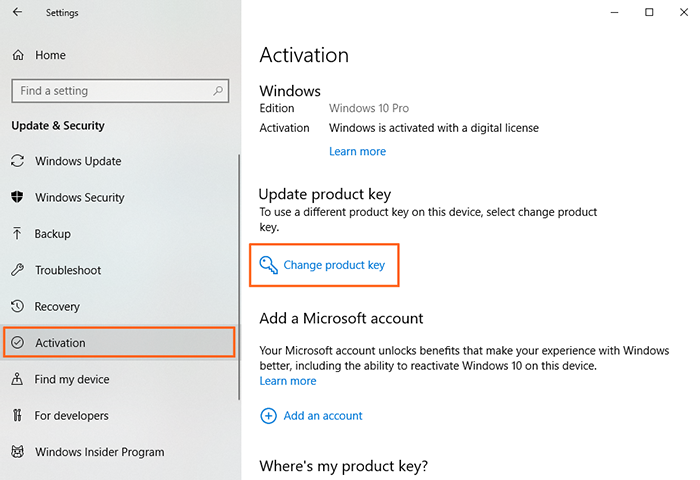
- Click the Change product key text – a window requiring you to enter your product key will appear.
- Enter the product key that you received with your order and click Next.