This guide shows you how to install and activate Windows 10.
Before installing, please make sure that your new computer meets the minimum system requirements:
- processor: 1 GHz
- memory: 1 GB RAM for 32-bit, 2 GB RAM for 64-bit
- hard disk space: 16 GB for 32-bit; 32 GB for 64-bit
- screen resolution: 800 x 600 pixels
- graphics: DirectX 9 graphics processor with WDDM 1.0 driver
Additionally, you need:
- an empty USB drive of minimum 8 GB;
- another computer with an internet connection and at least Windows 7 or newer installed on it.
Step-by-step guide
- Insert the USB drive that you want to use as your installation media into the computer which already has an operating system. Make sure you know which drive letter it’s been assigned (D, E, F, etc.).
- Download Media Creation Tool (MCT):
- Run MediaCreationTool.exe and follow the instructions in the slideshow below to create a Windows 10 bootable USB drive (click the orange arrows to navigate):


- When the process is finished, close Media Creation Tool and unplug the USB.
- Plug the Windows 10 bootable USB in the device on which you want to install Windows 10.
- Turn the computer on – during start-up it should automatically recognize the bootable USB as an installation media for Windows 10.
Follow the instructions in the slideshow below to install Windows 10 (click the orange arrows to navigate):


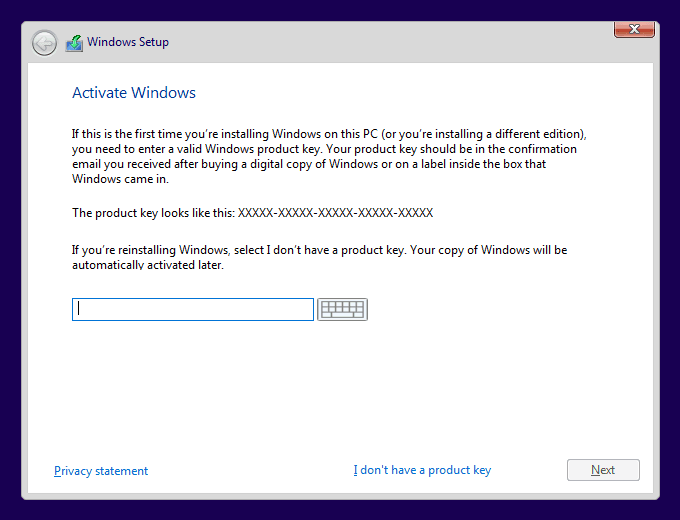
In this step, Windows Setup will ask you to enter your product key. There are 2 options:
1. enter the product key – the setup will automatically select a Windows edition based on the key you entered and will activate it;
2. skip this step – you can click “I don’t have a product key” and activate your Windows after installation.

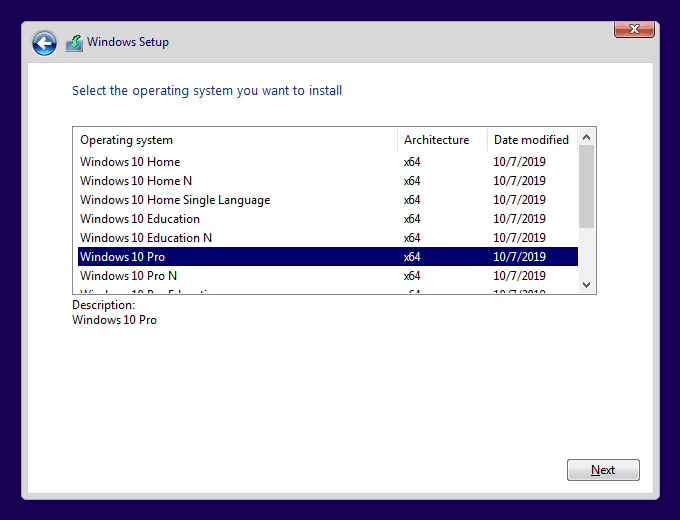
If you didn’t enter a product key in the previous step, Windows Setup will now ask you to select your edition.
IMPORTANT: you must select the exact name of the edition for which you have a product key, otherwise you won’t be able to activate it later.


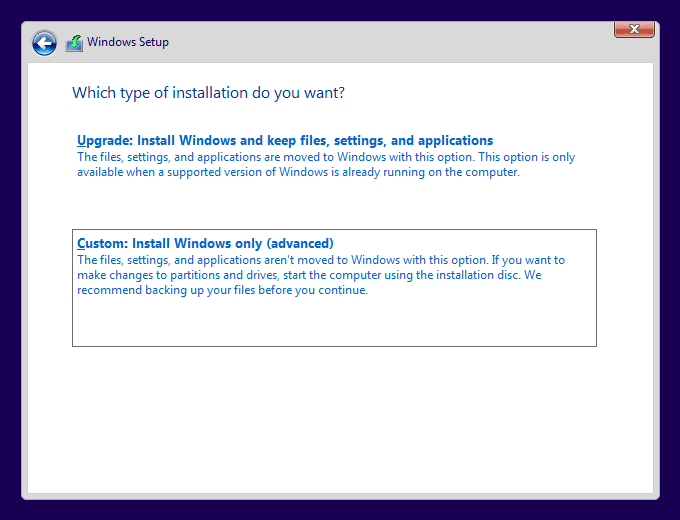
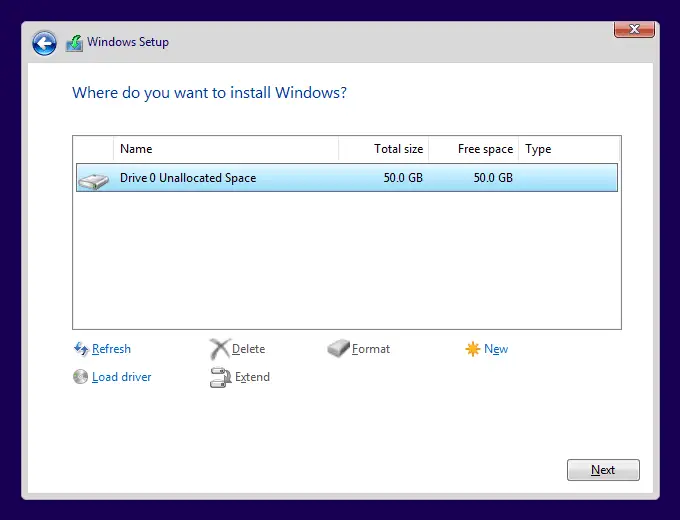
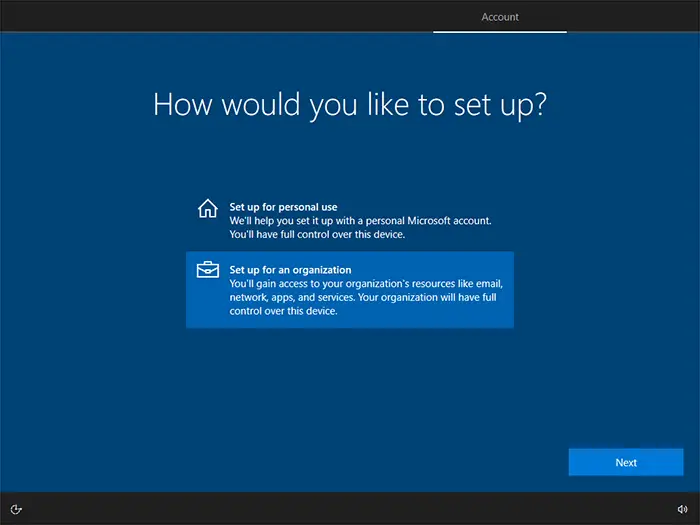
There are 2 options in this step:
1. Upgrade – keeps
files, apps and settings;
2. Custom – performs a clean installation.
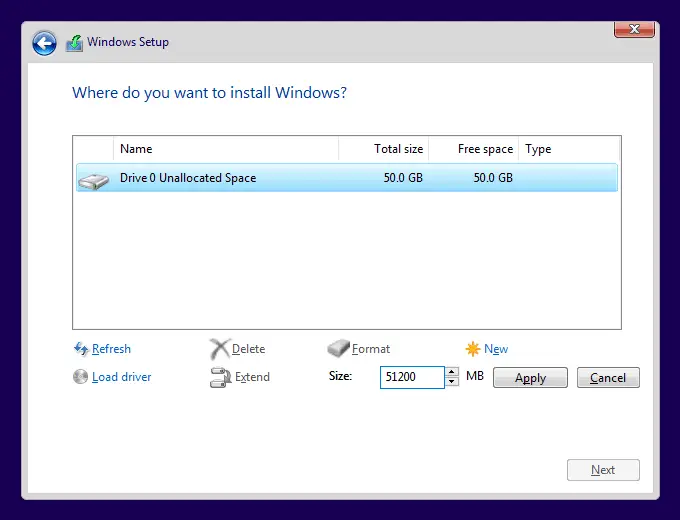
This guide uses the Custom option.


When the Windows 10 installation finishes, before being able to do anything else, you will be asked to configure your Windows account and a couple of other settings. Follow the instructions in the slideshow below (click the orange arrows to navigate) to set up Windows 10 quickly and without unnecessary clutter:


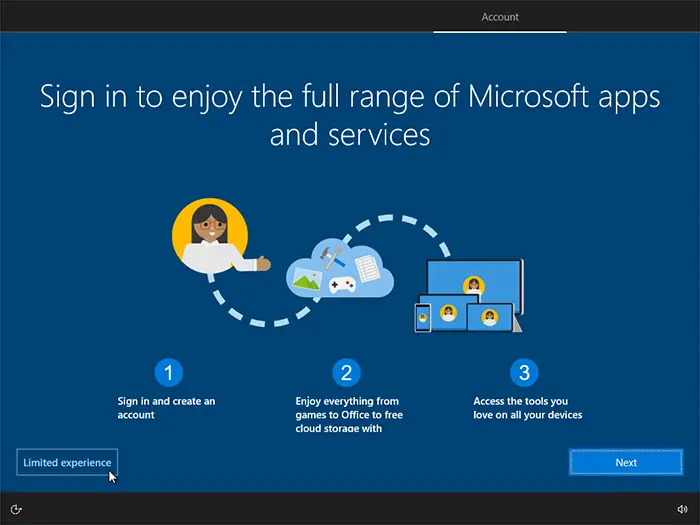
If you select the Offline account option, the configurator will attempt to convince you to create an online account. You can skip this by selecting “Limited experience” in the lower left corner.
The experience is not really limited, it is just not as tied to Microsoft’s online services as when users sign in with a Microsoft account. You can change to an online account any time after installation from the Start menu by going to Settings → Accounts.


Choose whether you want Cortana as your digital assistant or not. Have in mind that Cortana may not be available for all regions.
You can skip this step by clicking Not now.


Windows 10 must be activated within 30 days after the first login into the system.
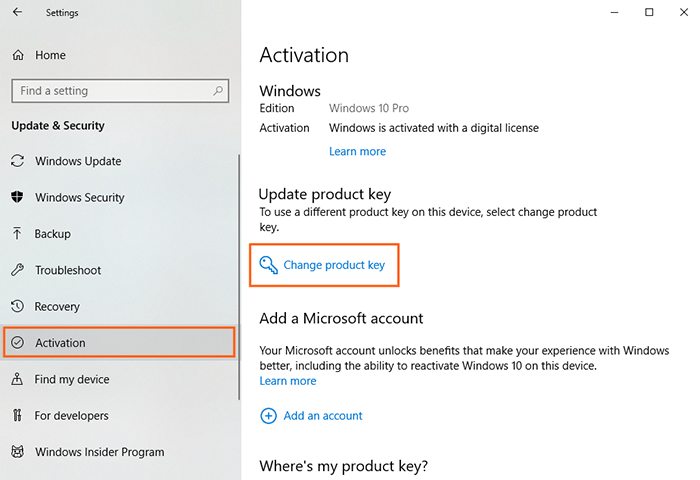
- Open the Start menu and click the Settings icon:
- Click Update & Security and go to Activation.
- Click the Change product key text – a window requiring you to enter a product key will appear.
- Enter the product key that you received with your order and click Next – your Windows will be activated and ready to use.