This guide shows you how to upgrade Windows 10 to Windows 11.
Before upgrading, please make sure that your computer meets the minimum system requirements:
- processor: 1 GHz, 64-bit, dual-core Intel, AMD, or Qualcomm (click for details)
- memory: 4 GB RAM
- hard disk space: 64 GB
- screen resolution: 720p (HD) display, minimum 9 inches, 8 bits per color channel
- graphics: DirectX 12 graphics processor with WDDM 1.0 driver
- Trusted Platform Module (TPM) 2.0
Choose an option
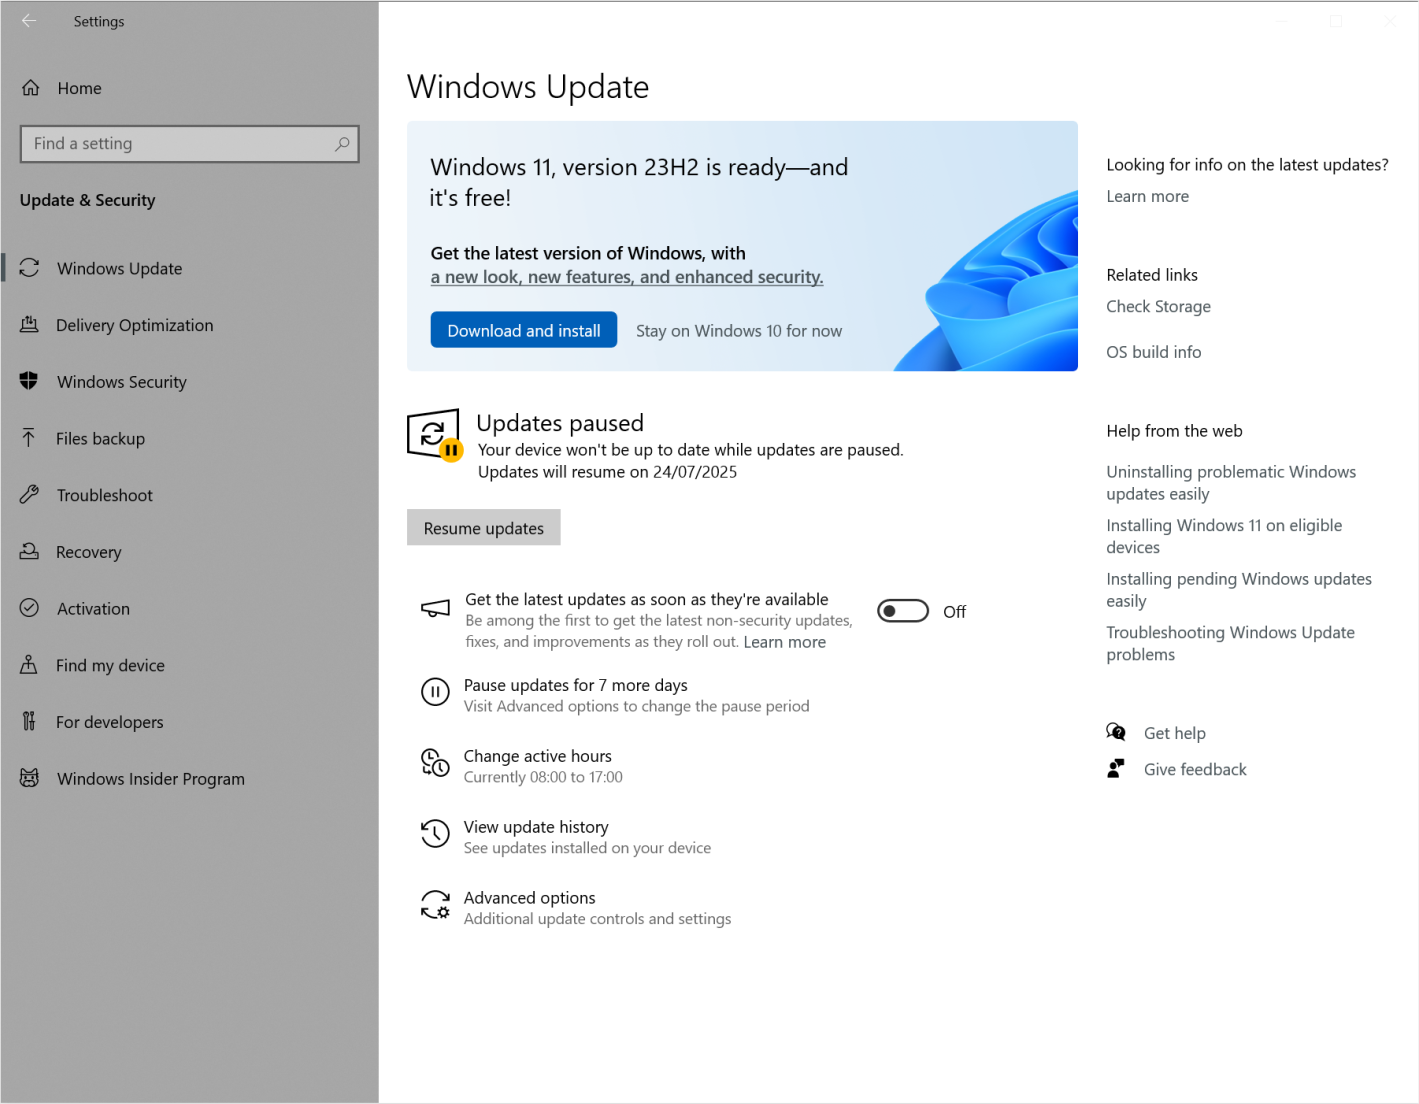
- Back up your data.
- Go to: Settings → Update and Security → Windows Update. The upgrade can be then launched within your Windows 10 directly by clicking Download and install.
- Back up your data.
- Go to the official Windows 11 software download page, scroll to section Create Windows 11 Installation Media and click the Download Now button.
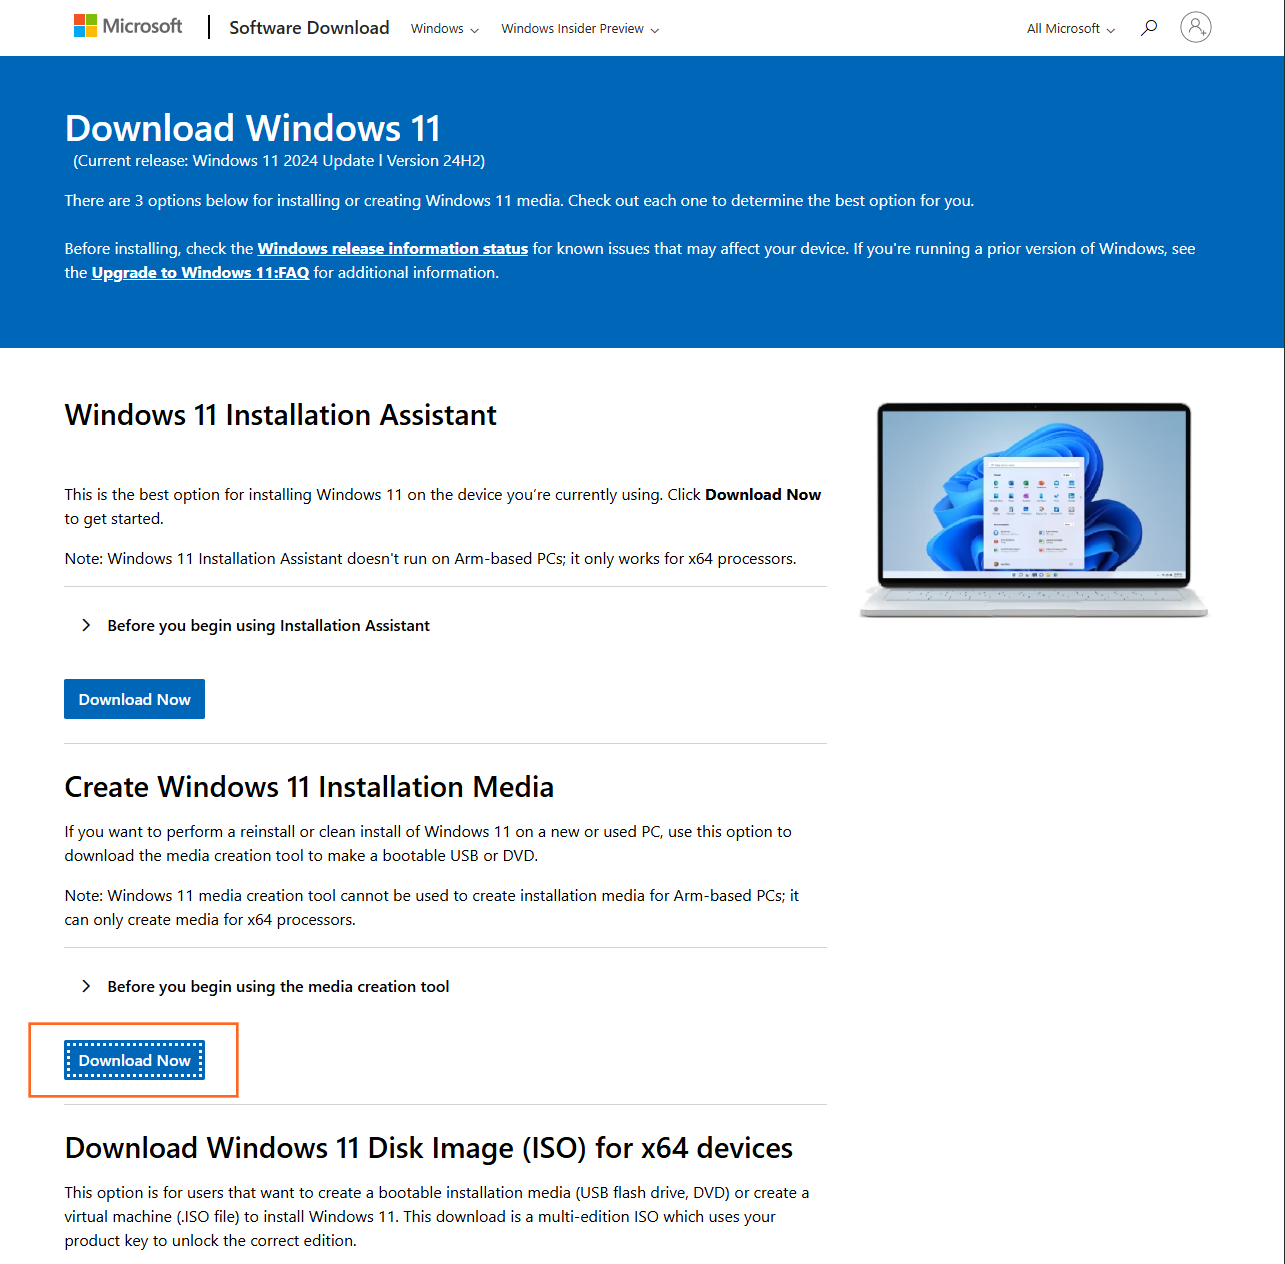
- Open Media Creation Tool once it’s downloaded, and when asked to choose between USB and ISO, pick ISO.
- Run the ISO file when it’s ready and open the setup.exe file. Eventually you will be able to choose between 3 options:
Perform a Full Upgrade
This option keeps personal files (including drivers), apps, and Windows Settings. This is the best option when you want to keep all files, apps, and settings intact after the upgrade.
Keep Data Only
This option will only keep personal files (including drivers), but won't keep apps, nor Windows Settings.
Clean Install
This option will install Windows 11 and keep nothing from the previous Windows 10 installation. Warning – it will remove all previous files and data on the device!
- Select accordingly and follow the instructions until the upgrade is finished.