Remote Desktop Services (RDS) – installation and activation
Step-by-step guide for enabling Remote Desktop Services, activating the License Server, and installing RDS CALs on Windows Server.
Before proceeding with the RDS setup, please make sure that you have installed, activated and updated your Windows Server!
Step-by-step guide
Follow the steps below in their natural order, or click on the links below to go to a specific step:
I. Enable Remote Desktop Services
II. Activate Remote Desktop License Server
III. Install RDS CALs
I. Enable Remote Desktop Services
Launch the Server Manager dashboard. Select Manage from the toolbar on the top right corner of the screen. From the drop-down menu, click Add Roles and Features.
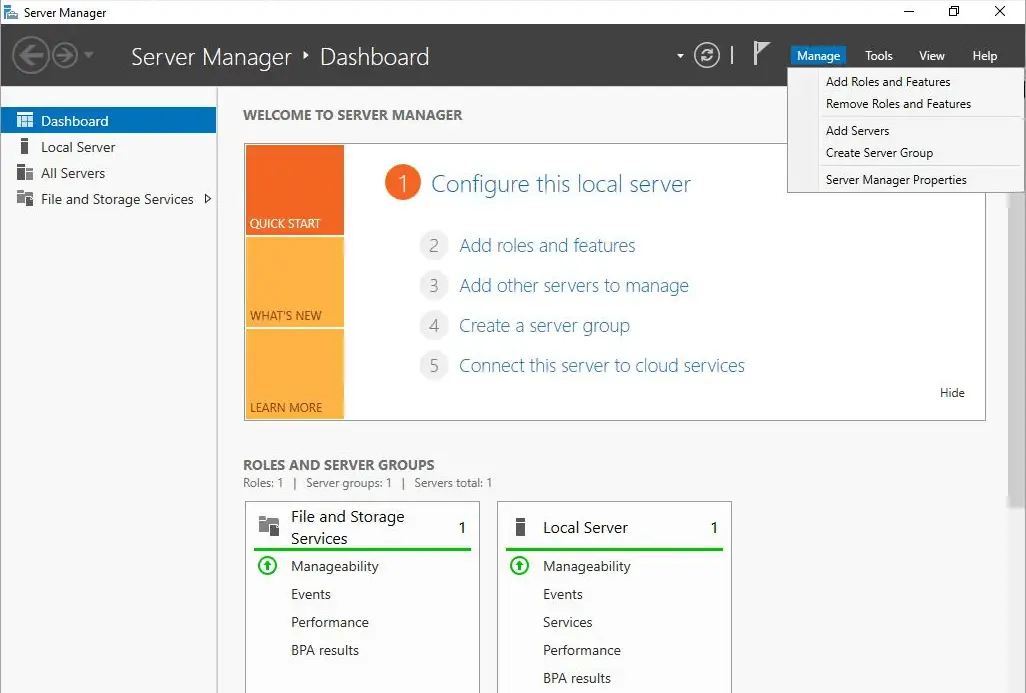
On the Before you begin page, read the information and click Next.
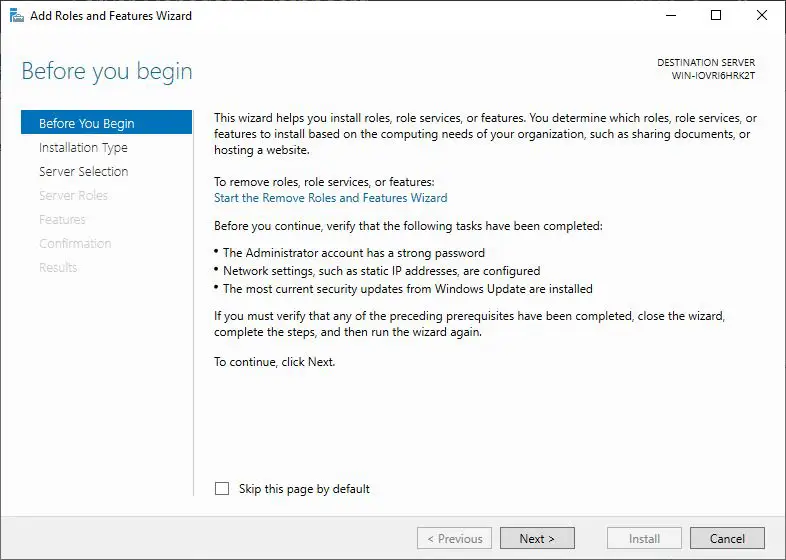
On the next page Select installation type page, select Role-based or feature-based installation. Click Next.
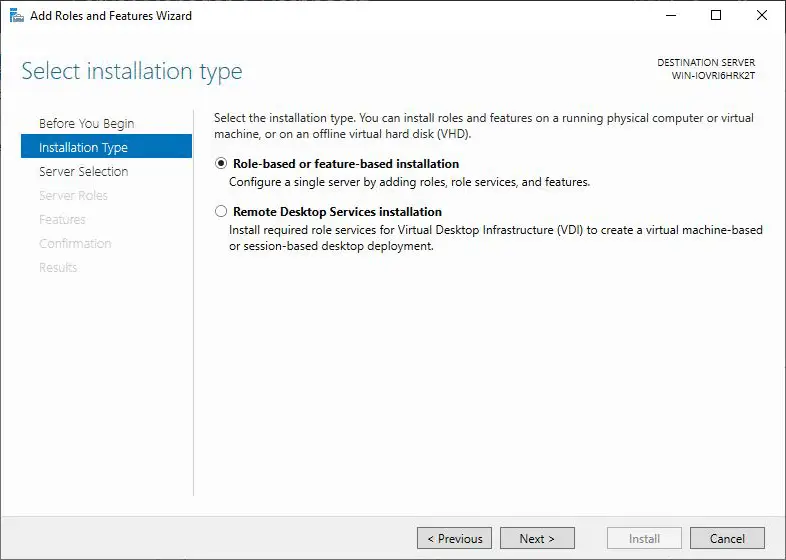
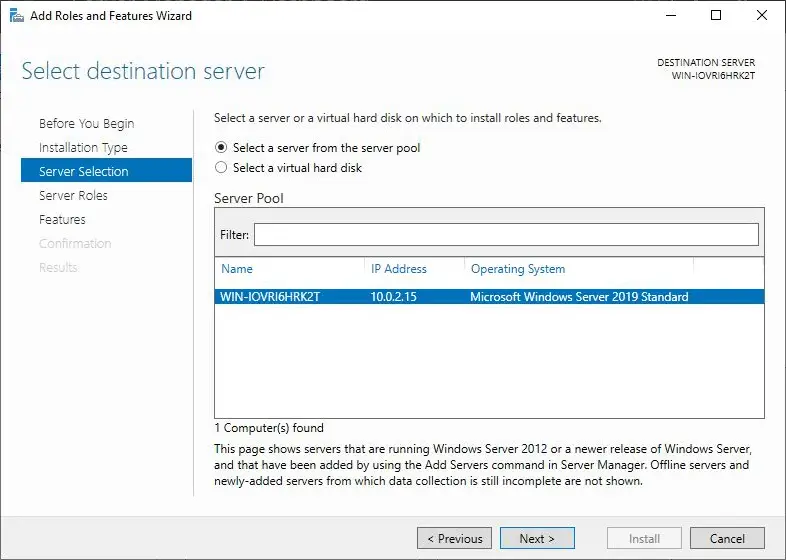
In the next step, on the Select destination server page, select the server on which you want to install the Remote Desktop Services. Click Next.
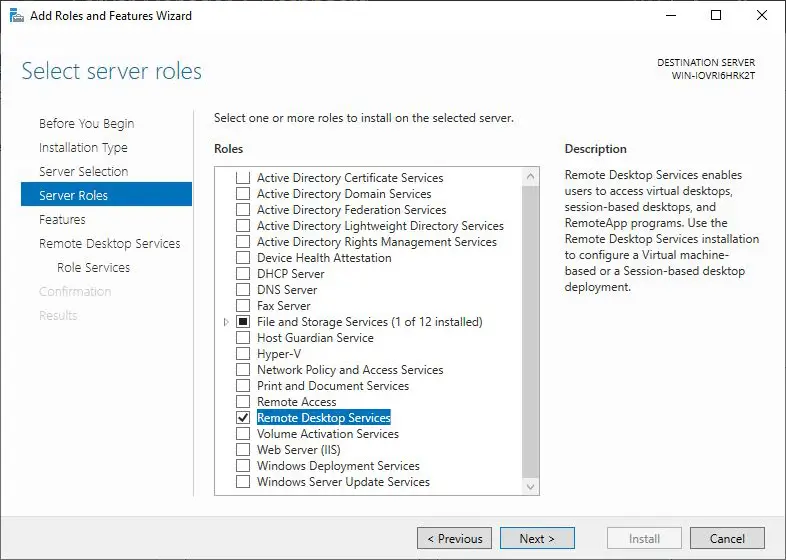
On the Select server roles page, click the checkbox before Remote Desktop Services. Then, click Next.
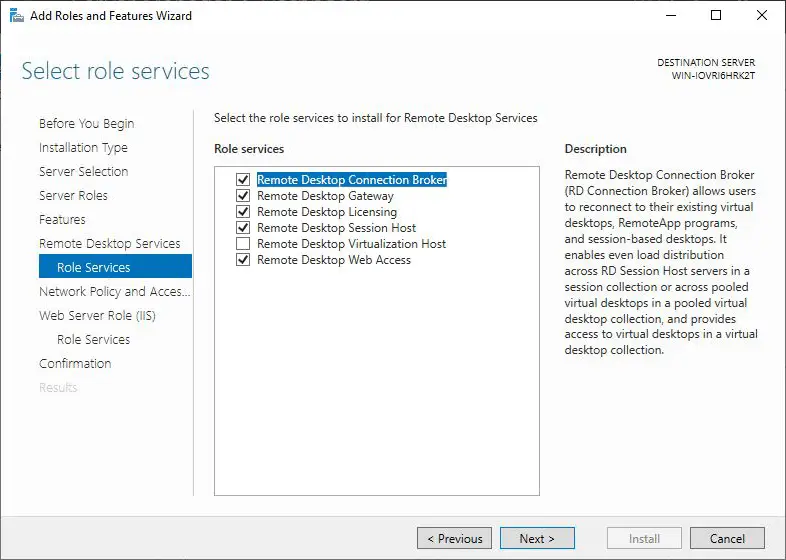
The Features window allows adding some additional features to the server. You can skip this part. In the Select role services screen, select:
Remote Desktop Connection Broker;
Remote Desktop Gateway;
Remote Desktop Licensing;
Remote Desktop Session Host;
Remote Desktop Web Access.
Afterwards click Next.
On the Network policy and access service and Web server role pages, you can keep the default settings or adjust them according to your needs.
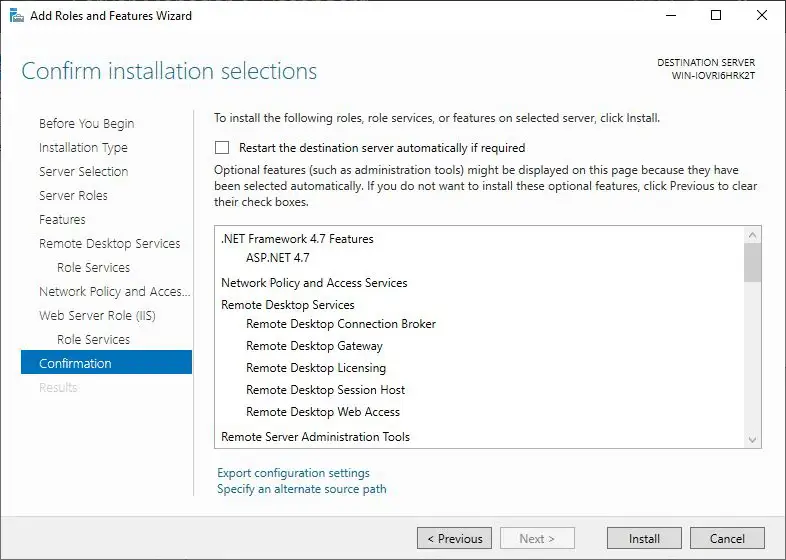
Once you have all the settings set, the Confirm installation selections page will appear. Click Install to begin the installation process.
When your License Server is activated, it is assigned a unique License Server ID. This ID is required to generate a product key for your RDS CAL.
II. Activate Remote Desktop License Server
First, you have to open the Remote Desktop Licensing Manager. Click on the Start menu, go to Administrative Tools → Remote Desktop Services, and then click Remote Desktop Licensing Manager.
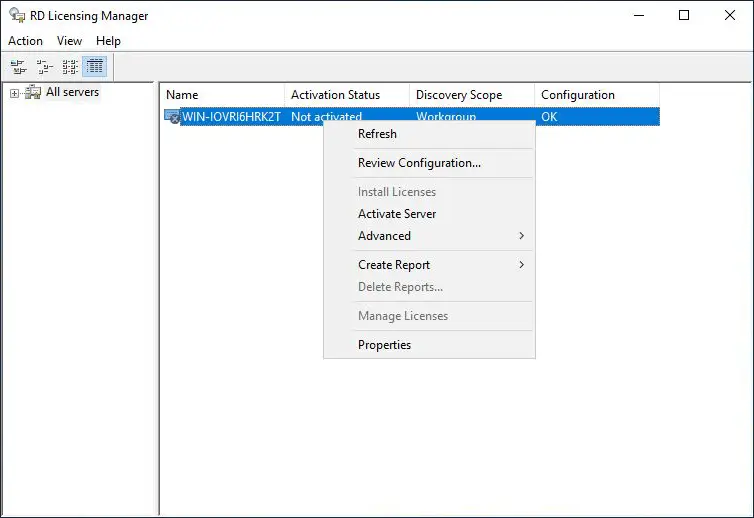
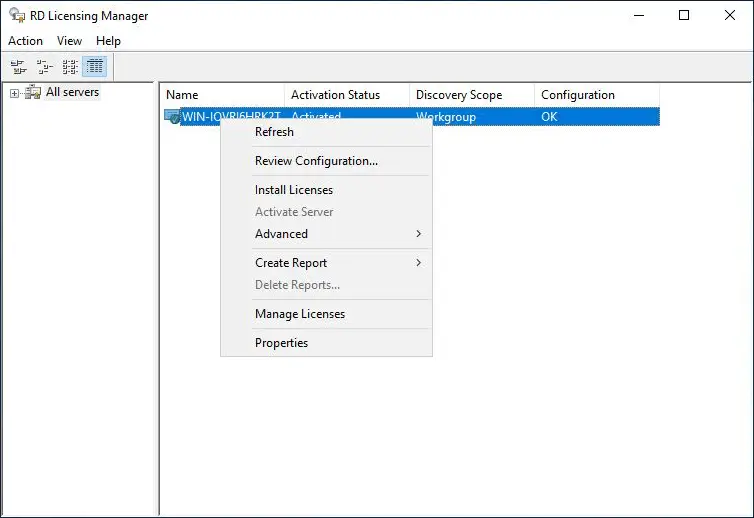
Right-click on the license server that you want to activate, and select Activate Server. The Activate Server Wizard will start.
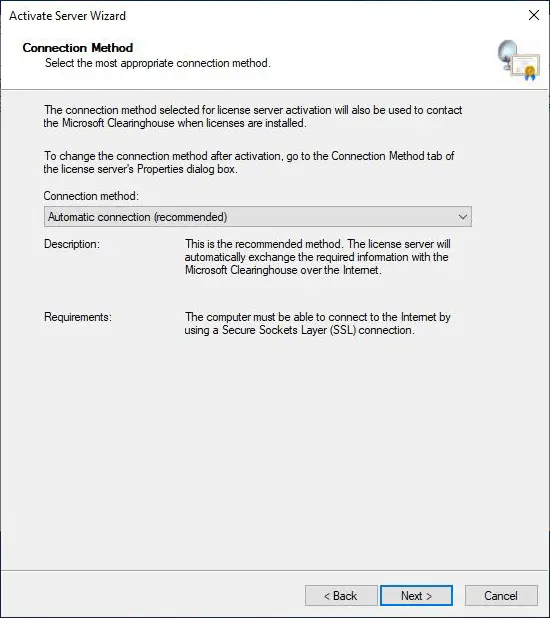
On the Connection Method page, select Automatic connection (recommended), and then click Next.
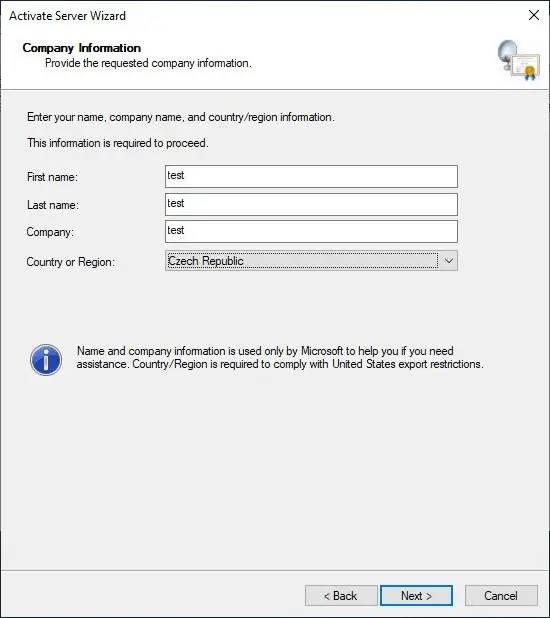
Provide your company information on the Company Information page, and then click Next. On the next page, you can provide additional, optional information. Click Next to continue.
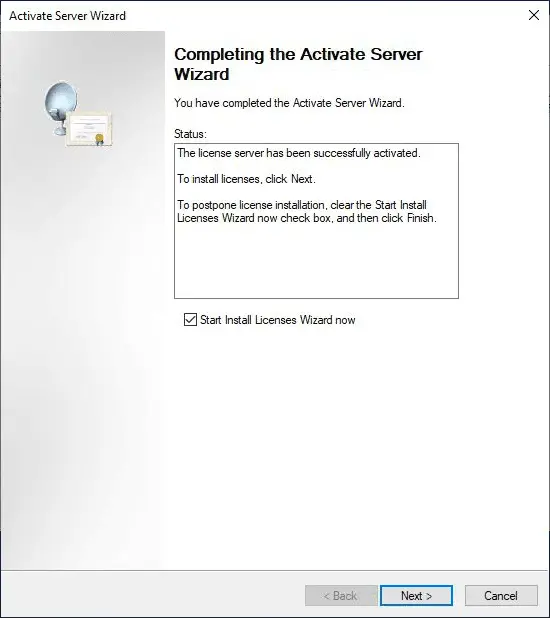
The installation wizard will now contact Microsoft servers and activate your server. Once it’s confirmed, you will see the Completing the Activate Server Wizard page. Click Next to start the installation.
Once the installation is successful, you continue with the Remote Desktop License Server activation.
III. Install RDS CALs
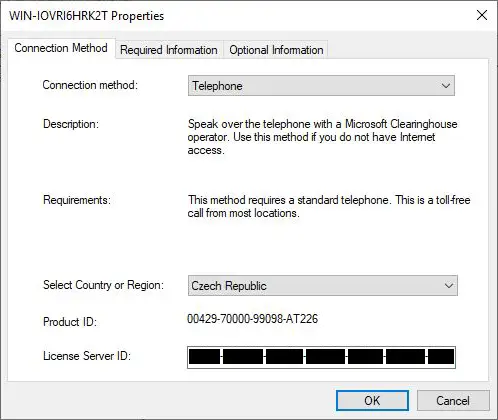
First, open the Remote Desktop Licensing Manager, right-click on the server name, and select Properties in the context menu.
To be able to install your RDS CAL product key, make sure that the connection method has been set to Telephone.
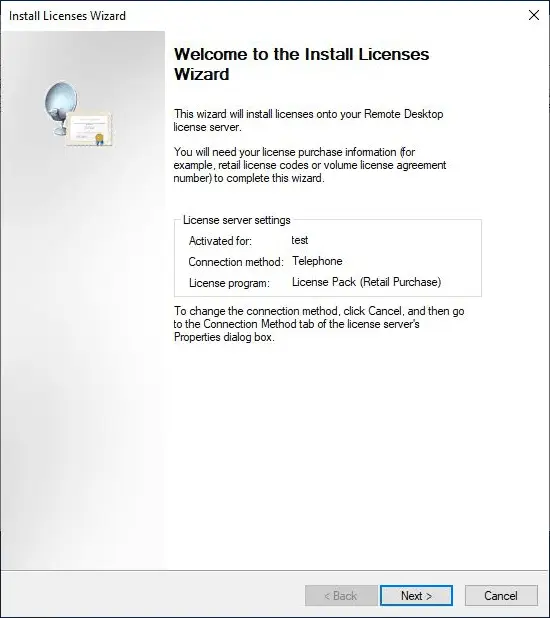
Right-click on the server name again, and select Install licenses in the context menu; skip the welcome page by clicking on "Next".
In the "Install Licenses Wizard", enter the license key pack ID and confirm by clicking "Next". This will complete the installation of the RDS CALs and you can start using Remote Desktop Services.
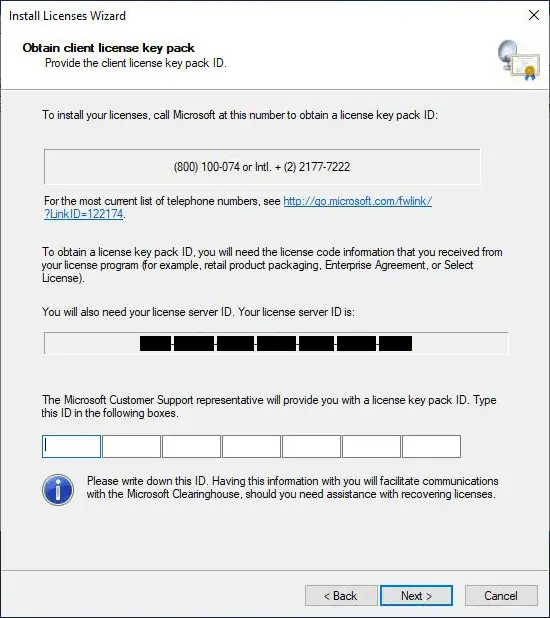
Don't know how to obtain the license key pack ID for your server? Follow our guide here:
How to install or move RDS CALs with the Microsoft Remote Desktop Self-Service activation platform