Windows 10 – installation and activation
Step-by-step guide for installing and activating Windows 10.
Before installing, please make sure that your new computer meets the minimum system requirements:
processor: 1 GHz
memory: 1 GB RAM for 32-bit, 2 GB RAM for 64-bit
hard disk space: 16 GB for 32-bit; 32 GB for 64-bit
screen resolution: 800 x 600 pixels
graphics: DirectX 9 graphics processor with WDDM 1.0 driver
Additionally, you need:
an empty USB drive of minimum 8 GB;
another computer with an internet connection and at least Windows 7 or newer installed on it.
Step-by-step guide
I. Create a Windows 10 bootable USB drive
Insert the USB drive that you want to use as your installation media into the computer which already has an operating system. Make sure you know which drive letter it’s been assigned (D, E, F, etc.).
Download Media Creation Tool (MCT):
Media Creation Tool (MCT) for Windows 10
Run MediaCreationTool.exe to start the installation wizard.
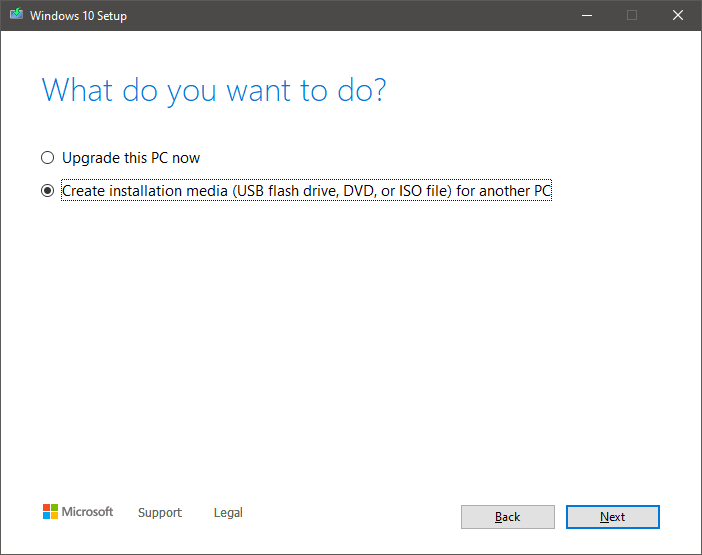
After accepting the terms and conditions, select Create installation media for another PC.
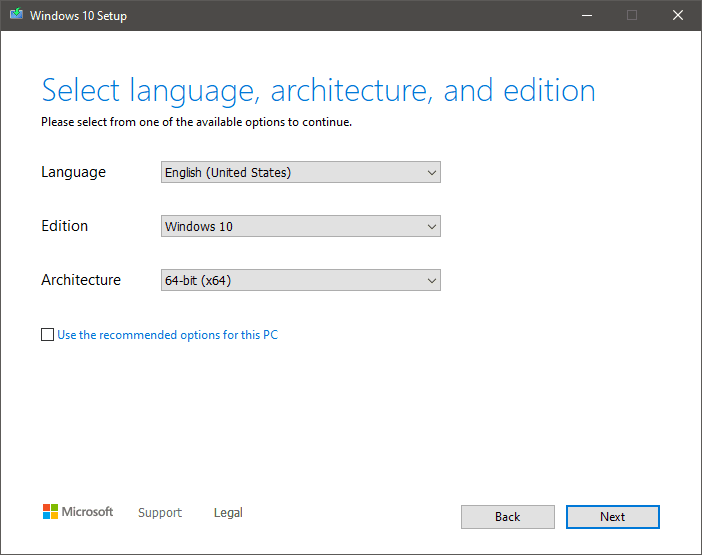
Select your language, edition, and architecture.
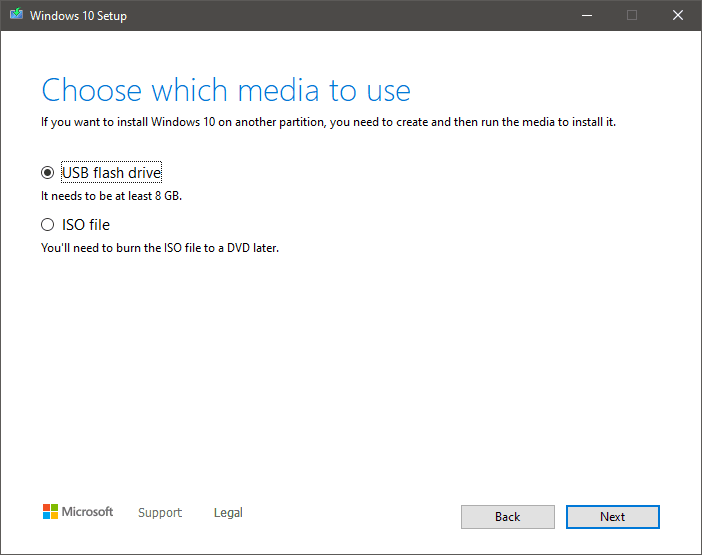
Select USB flash drive.
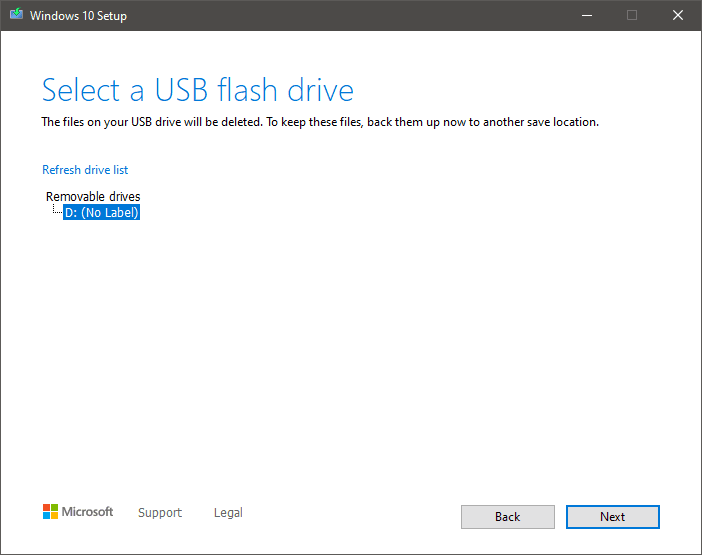
Select the USB drive you'd like to use.
Now the Media Creation Tool will begin converting your USB into a Windows 10 installation media. Wait for the process to complete and then click Finish.
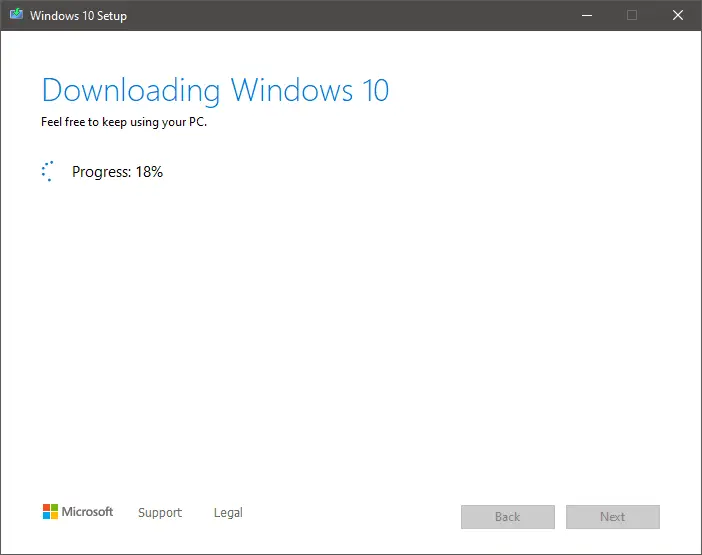
When the process is finished, close Media Creation Tool and unplug the USB.
II. Install Windows 10
Plug the Windows 10 bootable USB in the device on which you want to install Windows 10.
Turn the computer on – during start-up it should automatically recognize the bootable USB as an installation media for Windows 10.
Note: Installation not starting? Set up booting priority in BIOS – click here to learn how.
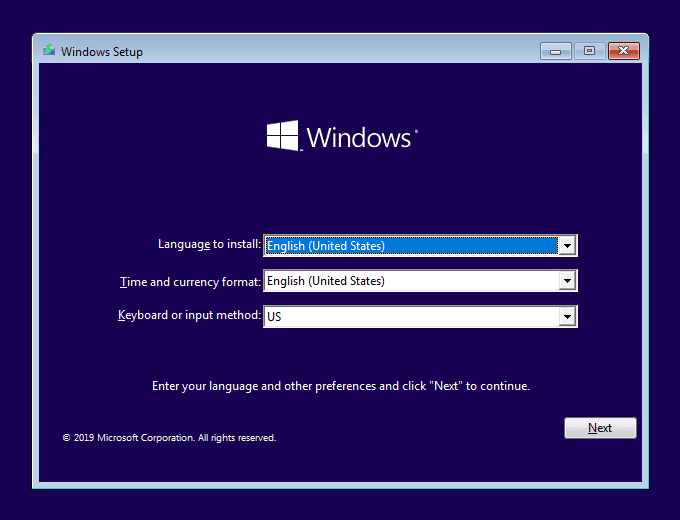
When Windows Setup starts, select the language, time and currency, and keyboard layout, then click Next.
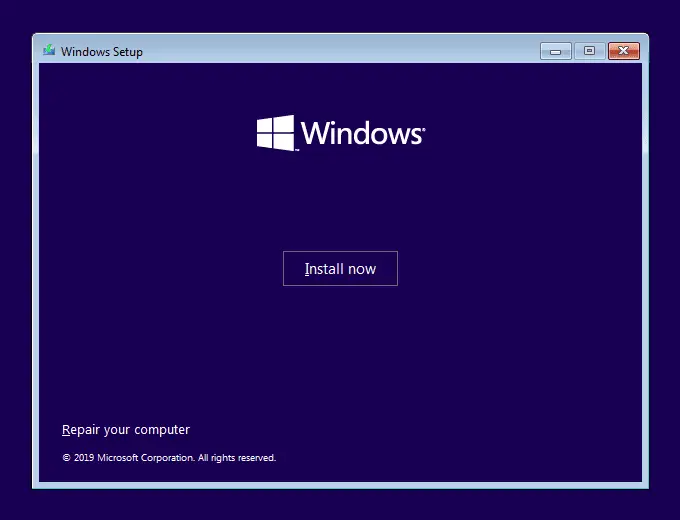
Click Install now.
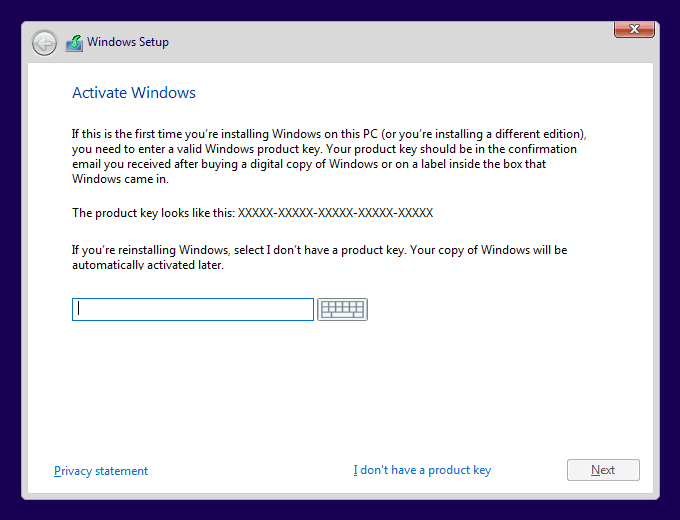
In this step, Windows Setup will ask you to enter your product key. There are 2 options:
enter the product key – the setup will automatically select a Windows edition based on the key you entered and will activate it;
skip this step – you can click “I don’t have a product key” and activate your Windows after installation.
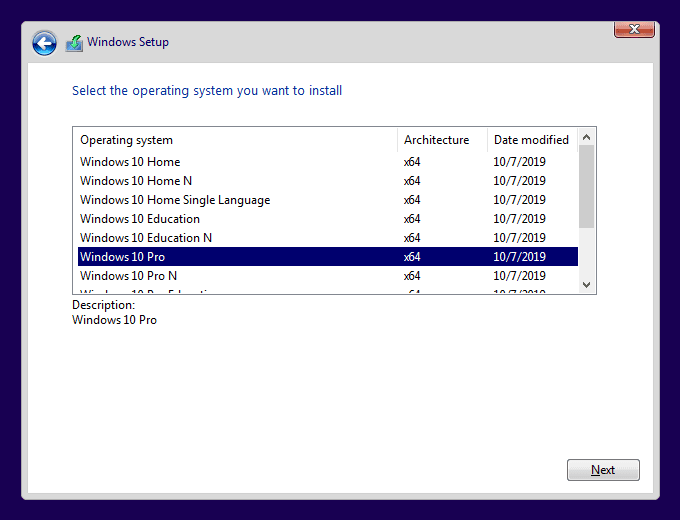
If you didn’t enter a product key in the previous step, Windows Setup will now ask you to select your edition.
IMPORTANT: you must select the exact name of the edition for which you have a product key, otherwise you won’t be able to activate it later.
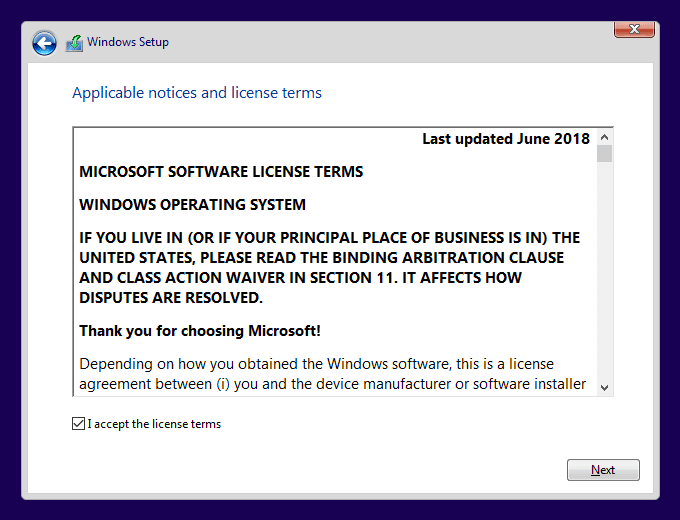
Accept the license terms and click Next to continue.
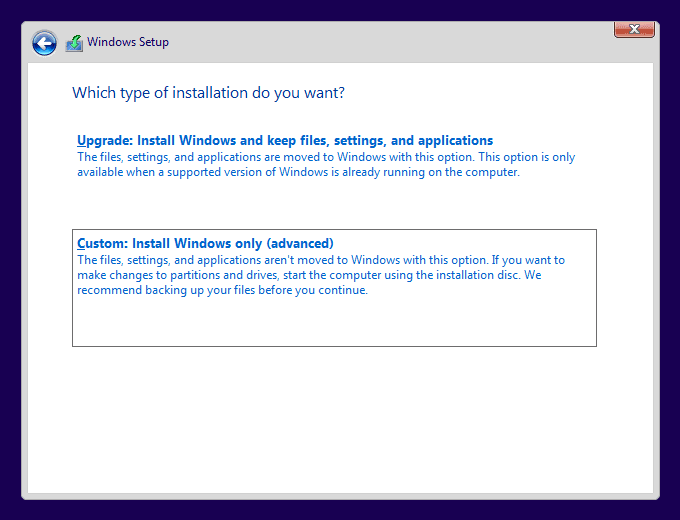
There are 2 options in this step:
1. Upgrade – keeps files, apps and settings;
2. Custom – performs a clean installation.
This guide uses the Custom option.
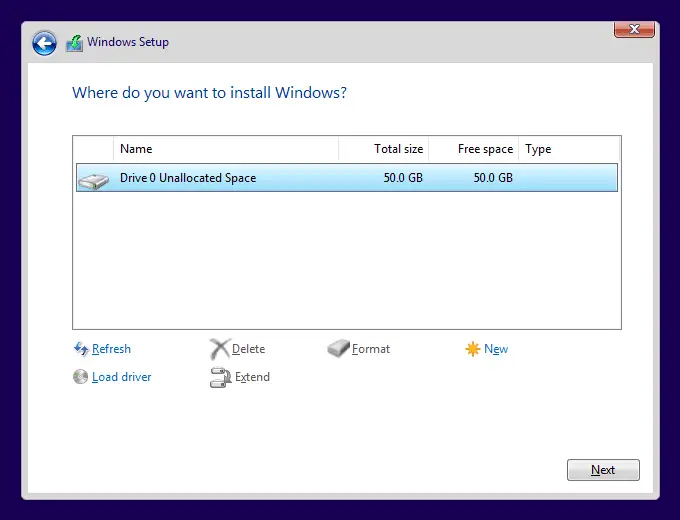
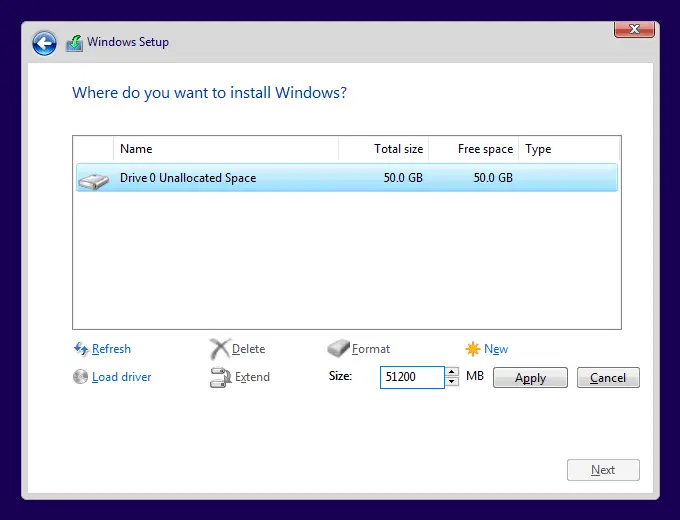
When doing a clean installation, you have to allocate disks for the system to use. You can separate your drive(s) in 2 or more partitions, or create a single partition. Click New to proceed.
In the Size field, type how many MB you want to allocate to the partition. The number cannot exceed the maximum capacity of your drive, but it can be smaller. Click Apply to create the partition.
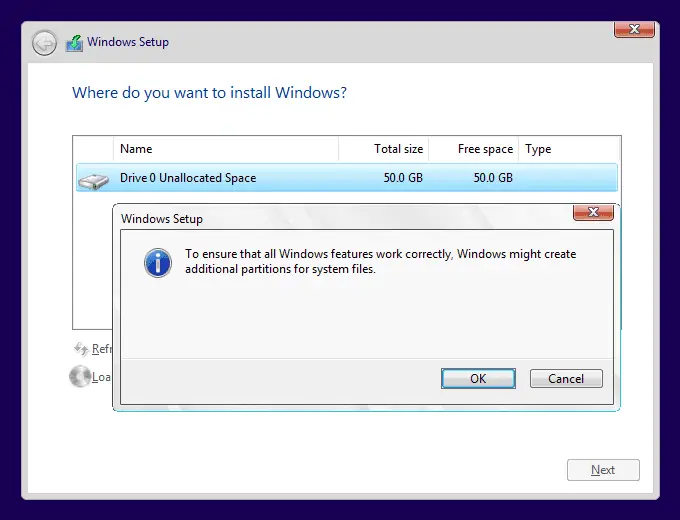
Windows Setup will inform you that it will create its own (small) partitions – this is normal and part of the process. Click OK to continue.
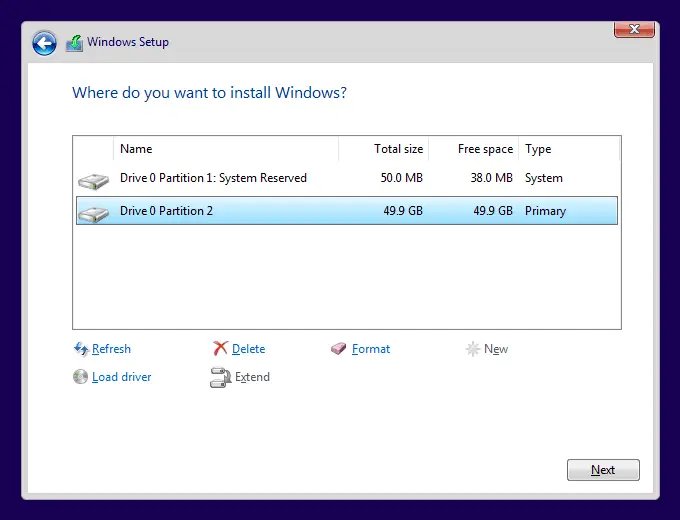
Your partitions are ready. Click Next to continue the installation.
Windows Setup will now start installing Windows 10. Do not close the setup window.
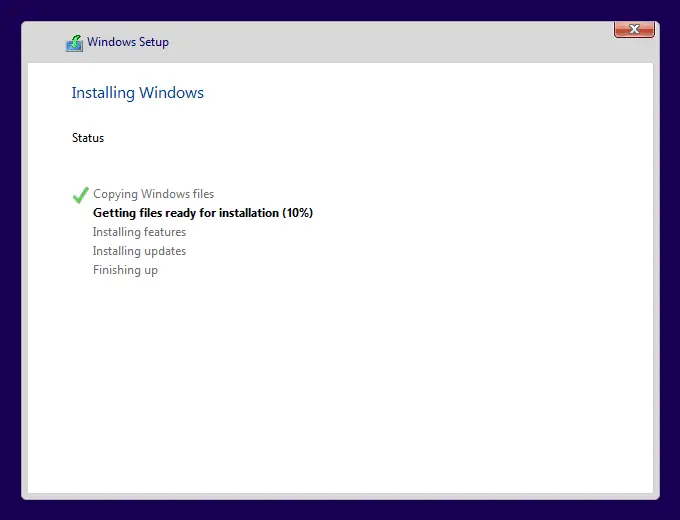
While installing, Windows 10 will restart several times. Wait for the black screen to go away to continue with the Windows 10 account configuration.
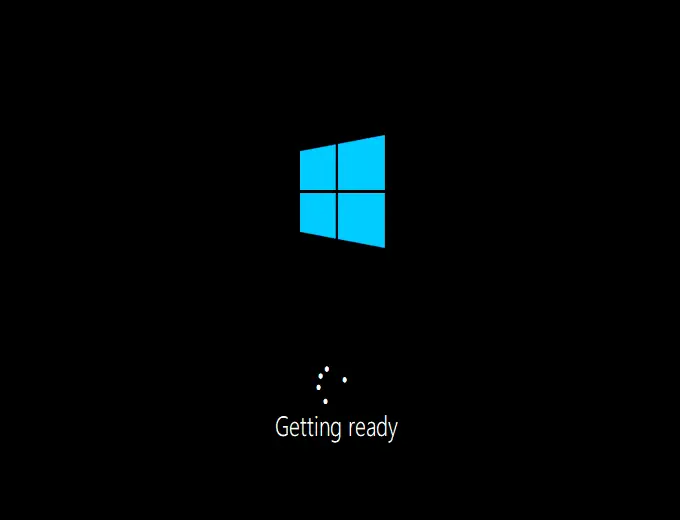
III. Configure Windows 10
When the Windows 10 installation finishes, before being able to do anything else, you will be asked to configure your Windows account and a couple of other settings. Follow the instructions below to set up Windows 10 quickly and without unnecessary clutter:
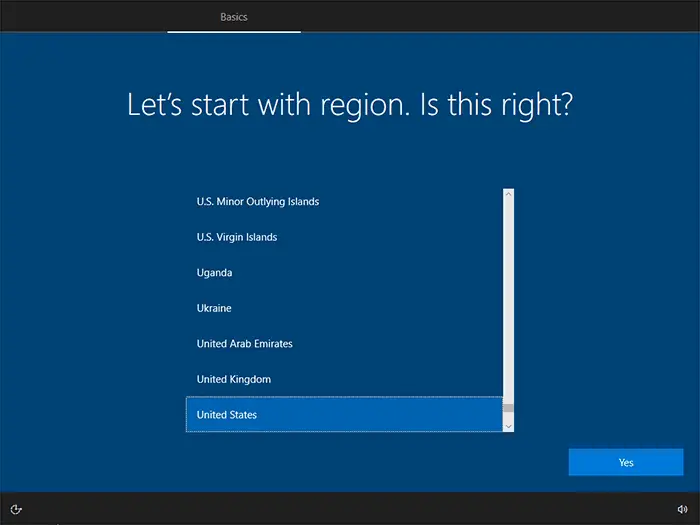
First, select your region.
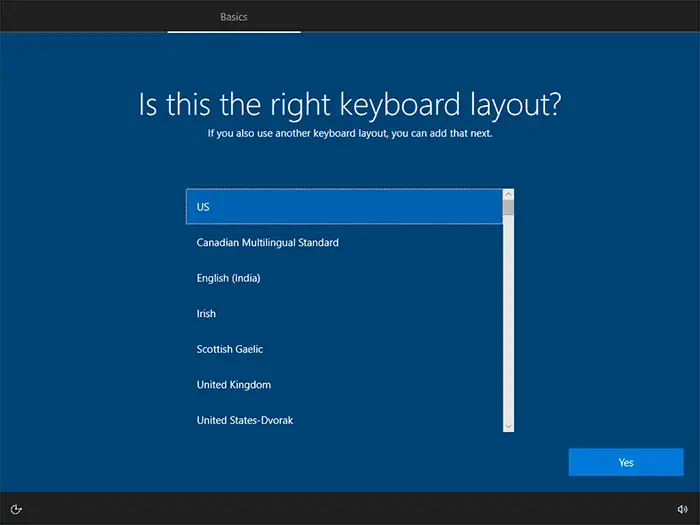
Choose which keyboard layout you want to use.
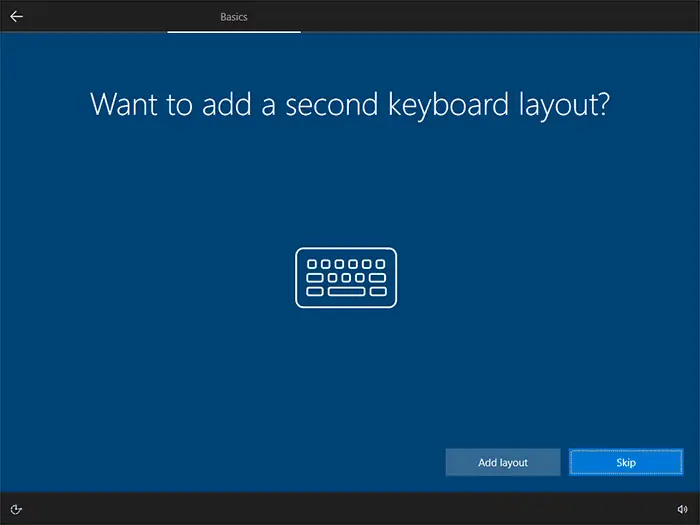
Next, you can add an additional keyboard layout, or just skip this step.
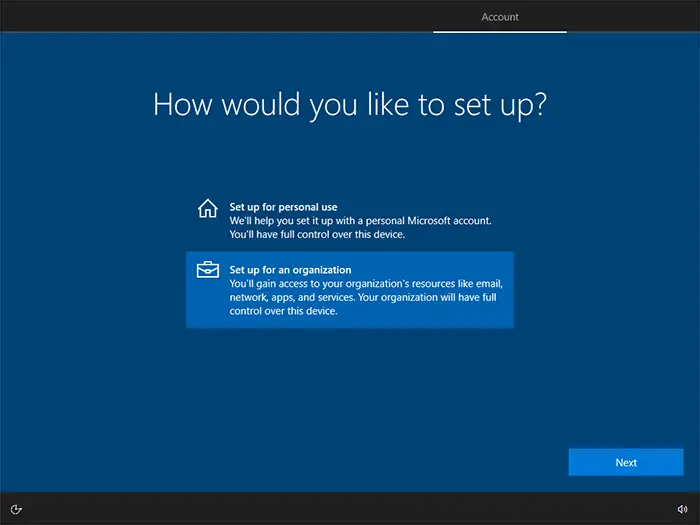
Select what kind of account you would like to set up – business, or home. This guide uses the business option.
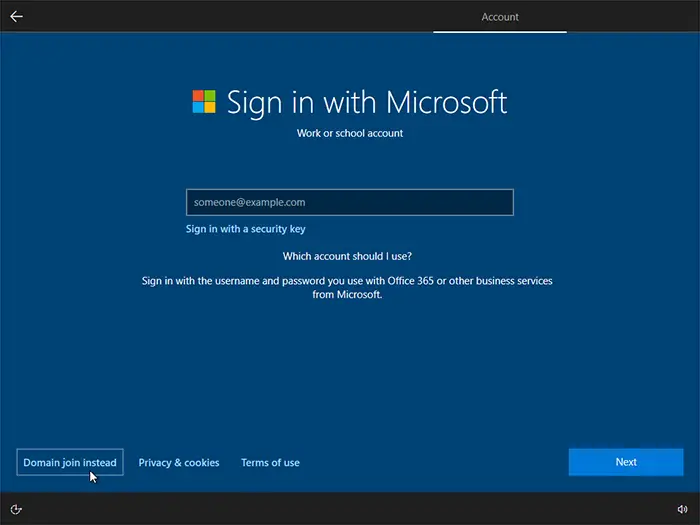
In this step, you can either log in with your existing Microsoft account, create a new Microsoft account, or create a local (offline) account without connection to Microsoft services. This guide uses the Domain join option which creates an offline account (lower left corner).
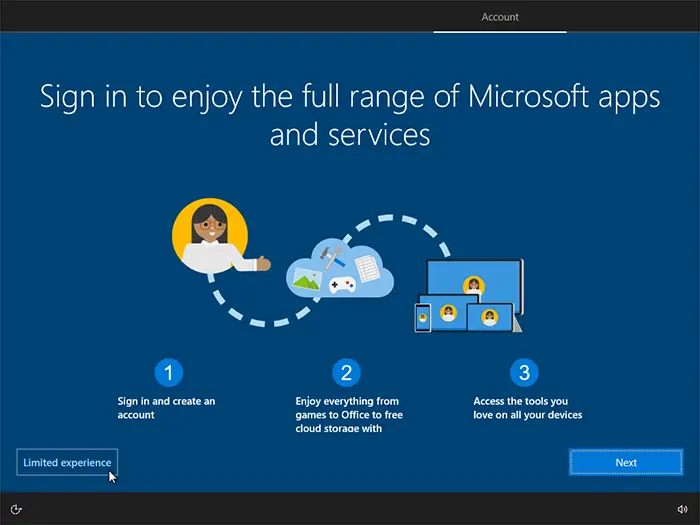
If you select the Offline account option, the configurator will attempt to convince you to create an online account. You can skip this by selecting “Limited experience” in the lower left corner. The experience is not really limited, it is just not as tied to Microsoft’s online services as when users sign in with a Microsoft account. You can change to an online account any time after installation from the Start menu by going to Settings → Accounts.
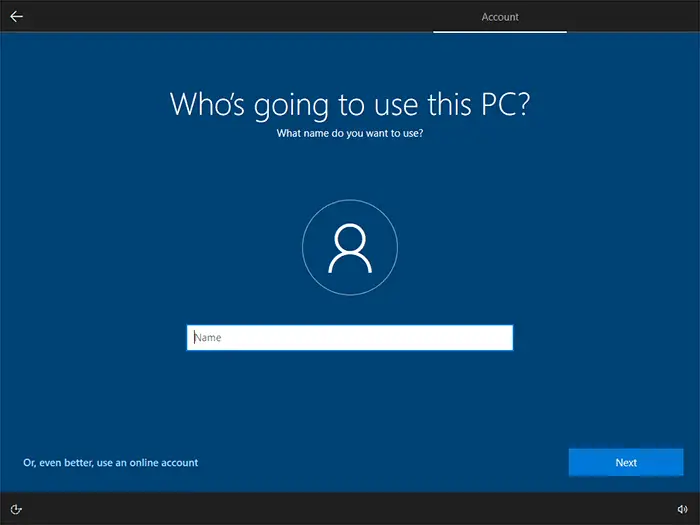
Type a name for your account.
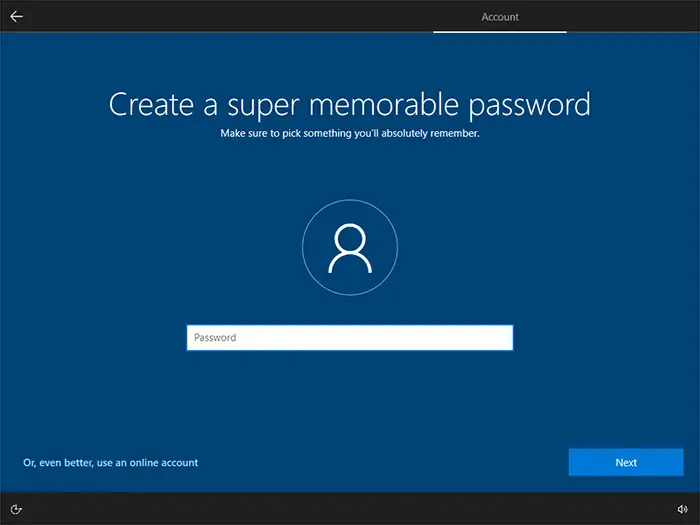
Create a password – we recommend making it strong by adding at least some capital letters and numbers.
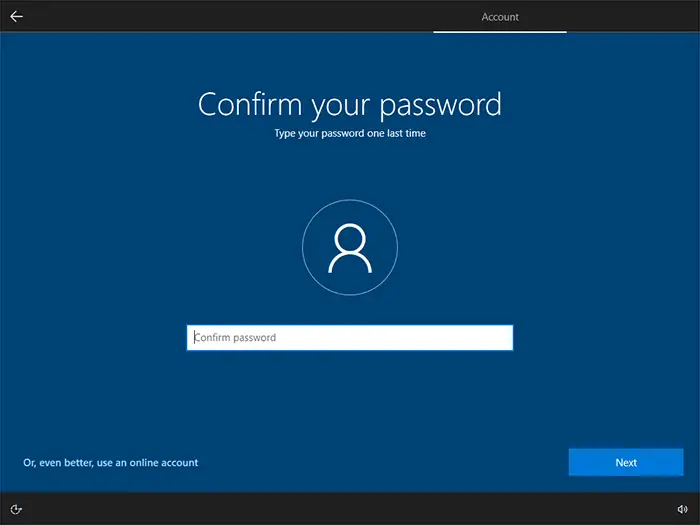
Type your password one more time.
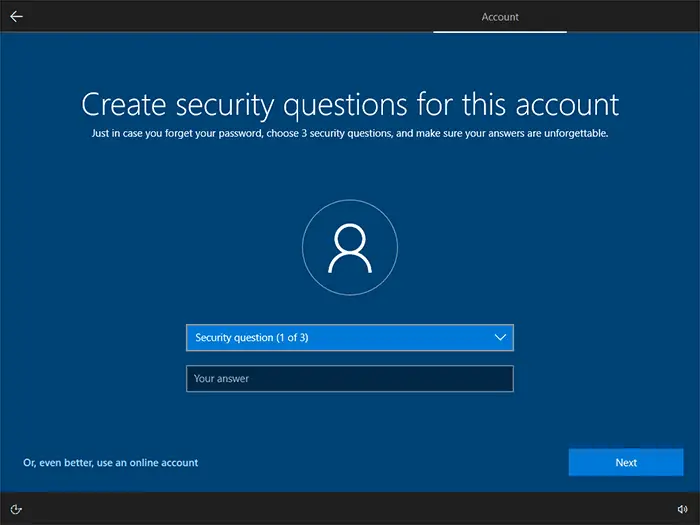
Select 3 security questions and type answers for them. In case of forgotten or lost password, Windows will try to identify you by your security questions.
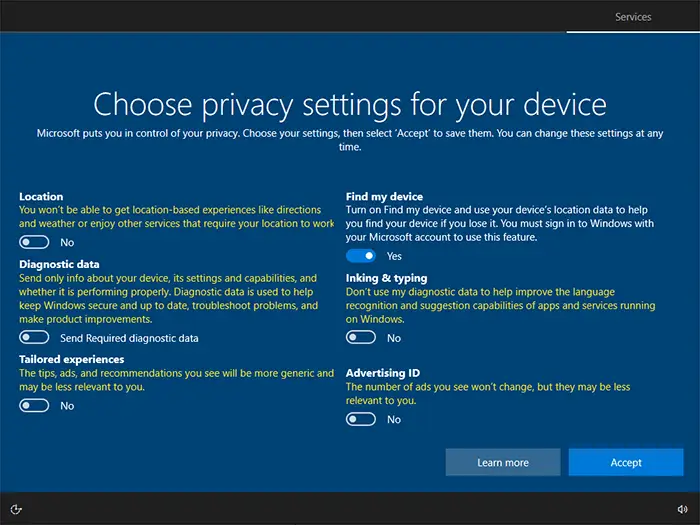
Select how much data you want to share with Microsoft.
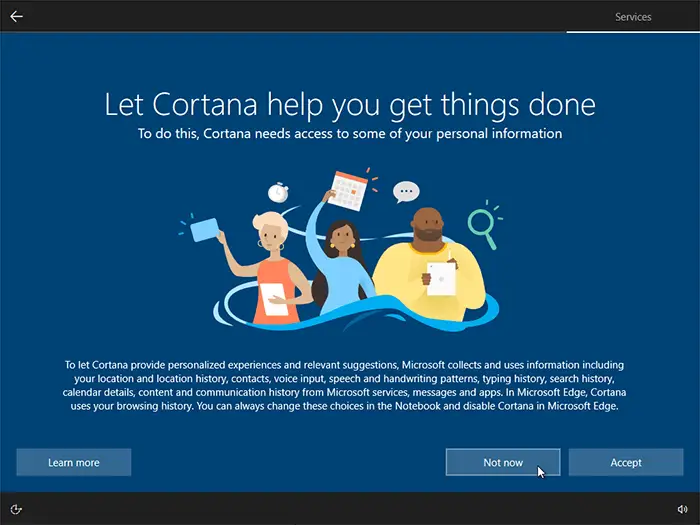
Choose whether you want Cortana as your digital assistant or not. Have in mind that Cortana may not be available for all regions.
You can skip this step by clicking Not now.
Now just wait until your Windows 10 is configured. When the system is ready to use, you will see the typical Windows login screen.
Note that you can change most of the configurations any time in the Settings menu – click the gear icon in the Start menu.
IV. Activate Windows 10
Windows 10 must be activated within 30 days after the first login into the system.
Open the Start menu and click the Settings icon.
Click Update & Security and go to Activation.
Click the Change product key text – a window requiring you to enter a product key will appear.
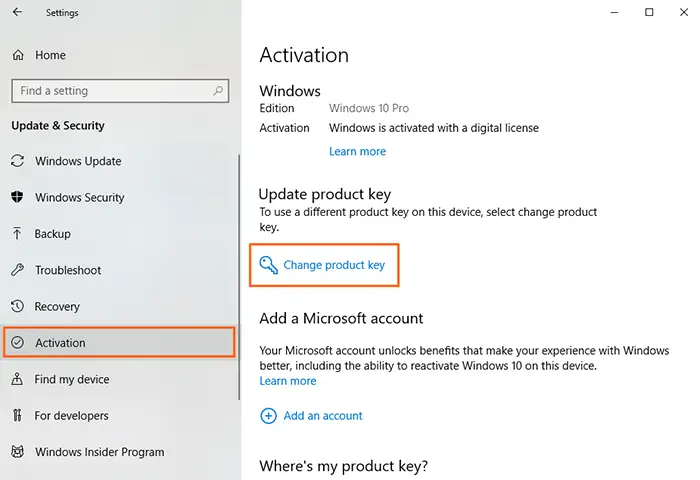
Enter the product key that you received with your order and click Next – your Windows will be activated and ready to use.